ADDI Install (1hr)
Overview
This section will walkthrough the automation scripts for the ADDI install. This install will consist of four components:
- Adoptium Java Runtime Environment
- Eclipse
- SQL server and its user permissions
- ADDI
This section will also walkthorugh the configurations for:
- TLS Connections
- DB2 Cloud Database
Script Walkthrough
Adoptium Java Runtime Environment (5 mins)
Navigate to the appropriate directory:
cd assets/papercuts/addi/java_installation
Run the automation script
.\java_install.ps1
Restart the shell and verify that Java is installed by running
java -version
You should get a similar output
PS C:\Users\Administrator> java -version
openjdk version “11.0.22” 2024-01-16
OpenJDK Runtime Environment Temurin-11.0.22+7 (build 11.0.22+7)
OpenJDK 64-Bit Server VM Temurin-11.0.22+7 (build 11.0.22+7, mixed mode)
Allow the ability to run scripts
Set-ExecutionPolicy Unrestricted
Eclipse Install (2 mins)
Run Java Runtime install first
Navigate to the appropriate directory:
cd assets/papercuts/addi/java_installation
Run the automation script
.\install_eclipse.ps1
SQL Server Install and User Permissions (20 mins)
SQL Server Install
This script will install Microsoft SQL server Navigate to the appropriate directory:
cd assets/papercuts/addi/sql_server_installation
Install MSSQL Server
.\sql_server_install.ps1
You should get a similar output
Attached          : False
BlockSize         : 0
DevicePath        :
FileSize          : 1426724864
ImagePath         : C:\Users\ADMINI~1\AppData\Local\Temp\sql_server_install\SQLServer2019-x64-ENU-Dev.iso
LogicalSectorSize : 2048
Number            :
Size              : 1426724864
StorageType       : 1
PSComputerName    :
------------------------------------------------------------------------------------------------------------------------------------------------------------------------------------------------------------------------------------------------------------------------------------------------------------
Microsoft SQL Server 2019 (RTM) - 15.0.2000.5 (X64)
        Sep 24 2019 13:48:23
        Copyright (C) 2019 Microsoft Corporation
        Developer Edition (64-bit) on Windows 10 Enterprise 10.0 <X64> (Build 22621: ) (Hypervisor)
(1 rows affected)
** Note Restart powershell **
PS C:\Users\Administrator\Downloads\solution-watsonx-wca4z-main\solution-watsonx-wca4z-main\assets\papercuts\addi\SQL_Server> "SELECT @@version" | sqlcmd
Windows PowerShell
Copyright (C) Microsoft Corporation. All rights reserved.
Install the latest PowerShell for new features and improvements! https://aka.ms/PSWindows
PS C:\Users\Administrator> “SELECT @@version” | sqlcmd
------------------------------------------------------------------------------------------------------------------------------------------------------------------------------------------------------------------------------------------------------------------------------------------------------------
Microsoft SQL Server 2019 (RTM) - 15.0.2000.5 (X64)
        Sep 24 2019 13:48:23
        Copyright (C) 2019 Microsoft Corporation
        Developer Edition (64-bit) on Windows 10 Enterprise 10.0 <X64> (Build 22621: ) (Hypervisor)
(1 rows affected)
PS C:\Users\Administrator>
SQL Server User Permissions (2 mins)
This script will create an addi user on the SQL server and give them the appropriate permissions. Be sure to fill out the .env file with the appropriate values before runing these scripts. Navigate to the appropriate directory:
cd assets/papercuts/addi/sql_server_install
.\sql_user_setup.ps1
ADDI Install (20 mins)
First we are going to download the executable for ADDI
Nagivate to this link
- Select "Part Number" below the "Search Options" label
- Search "M0H2CML"
- Select "HTTPs" as the download method
- Press "Search" and download the file
Next, update the .env files.
Navigate to the addi_installation folder:
cd assets\papercuts\addi\
Update the .env by adding the ADDI host's external IP address (or FQDN if possible) as the value for the ccsIP parameter and the ccsPort value if the default (2181) is already used.
Update the auto-install.xml files by adding the ADDI host's external IP address (or FQDN if possible) as the value for the CCS_IP and the CCS_PORT value if the default (2181) is already used.
Search for $addi_endpoint_install_binary. Change the value to location of the downloaded zipped file. (For example: $addi_endpoint_install_binary="")
$addi_endpoint_install_binary="[executable file path]"
Run:
cd assets\papercuts\addi\
.\install_addi.ps1
Be sure to complete the install by configuring ADDI through a web browser. If the page does not open automatically while the install script is running, navigate to this URL: https://localhost:9443/ad/admin/setup.
If you are having issues with ADDI Server not connecting to the SQL Server due to an incorrect login you can do the following:
Open powershell as an admin
sqlcmd
>> 1 ALTER LOGIN my_user WITH PASSWORD='me?*L=OchopRlx@9woc', CHECK_POLICY= OFF, CHECK_EXPIRATION = OFF;
>> 2 GO
Try again and you should now be able to login
Once ADDI has been installed, the next step is to install refactor on the refactor host, using the environmnent ID and host port from this ADDI host.
Configuring the certs on the ADDI host (8 mins)
Use the helper function to install OpenSSL
.\dependencies\install_open_ssl.ps1
Next you want to generate a SHA256 password. You can generate one online or use htpasswd and running the following command.
htpasswd -nbBC 10 addi_user p@ssw0rd
addi_user:$2y$10$vAk2SLjHIU2x2dNuzwDxDuq6TwdnLK1XeO8OCzxNqXK3yv3ObYfIy
Next, update the tls/.env file. Update each variable that has <> for the following Username, AddiIP, RefactorIP, and MyHashPassword
KeyPass="password"
KeyStorePath="C:\certificates\server_keystore.p12"
CertificatePath="C:\certificates\"
CertificatePathRoot="C:\certificates\root.crt"
RootFilePath="C:\root\certs\root.crt"
Username="Administrator"
AddiIP=<Your ADDI IP Address>
RefactorIP=<your Refactor IP Address>
MyHashPassword="<GENERATE YOUR HASH PASSWORD HERE using httpdpassword i.e 2$y$10....Iy>"
JreCaCertsPath="<JreCerts Path...>"
DB2CertPath="<Path to your DigiCertGlobalRootCA.crt can be generated on IBM Cloud DB2 > "
AddiFQDN=<Your ADDI FQDN>
RefactorFQDN=<Your Refactor FQDN>
e.g example of your .env file
KeyPass="password"
KeyStorePath="C:\certificates\server_keystore.p12"
CertificatePath="C:\certificates\"
CertificatePathRoot="C:\certificates\root.crt"
RootFilePath="C:\root\certs\root.crt"
Username="Administrator"
AddiIP=123.456.789
RefactorIP=223.456.789
MyHashPassword="$2y$10$vAk2SLjHIU2x2dNuzwDxDuq6TwdnLK1XeO8OCzxNqXK3yv3ObYfIy"
JreCaCertsPath="C:\Program Files\Eclipse Adoptium\jre-11.0.22.7-hotspot\lib\security\cacerts"
DB2CertPath="C:\certificates\DigiCertGlobalRootCA.crt"
AddiFQDN=<Your ADDI FQDN>
RefactorFQDN=<Your Refactor FQDN>
Then you can run the helper script .\tls_certs_configuration.ps1 to generate the following files.
combined.cercombined.crtroot.crtserver_keyserver_certificate.crtserver_keystore.p12zookeeper.crtzookeeper.yaml
You should get a similar output
C:\Users\oscar\Documents\oscars_dir\solution-watsonx-wca4z\assets\papercuts\addi\tls [papercuts/tls_certs_patch_1 ↓1 +4 ~0 -0 !]> .\tls_certs_configuration.ps1
Configure TLS Certs and Keystores
Environment variable 'AddiIP = 9.46.246.102' is not set.
.
.
.
Environment variable 'USERPROFILE = C:\Users\Administrator' is not set.
Environment variable 'windir = C:\Windows' is not set.
Directory C:\certificates\ does not exist... creating one now


    Directory: C:\


Mode                 LastWriteTime         Length Name
----                 -------------         ------ ----
d-----         3/27/2024   1:33 PM                certificates
GenerateKeyPair KeyStorePath: C:\certificates\server_keystore.p12 , KeyPass: password , FQDN: wca4z-eashan-test-winaddi
Export-CertificateToPfx KeyStorePath: C:\certificates\server_keystore.p12 , CertificatePath: C:\certificates\, KeyPass: password , Filename: server_certificate.crt , fullFilePath: C:\certificates\server_certificate.crt
Certificate stored in file <C:\certificates\server_certificate.crt>
Importing certificate to keystore with alias: self-signed-root
Certificate file not found: server_certificate.crt
ConfigureCerts RefactorIP: 9.46.246.104 , CertificatePath: C:\certificates\
Enter Import Password:

*****************************************************************************************
*  Systems must only be used for conducting IBMs business.                              *
*  IBM may exercise rights to manage and enforce security, monitor use,                 *
*  remove access or block traffic to and from this system, as well as                   *
*  any other rights listed in ITSS.                                                     *
*                                                                                       *
*  Users must comply with DevIT service terms of use, IBM policies,                     *
*  directives and corporate instructions including, import/export of data,              *
*  BCGs, Corporate Instructions, Standards, Addenda as well as all other                *
*  responsibilities listed in ITSS                                                      *
*****************************************************************************************
root@9.46.246.104's password:
root.crt                                                                              100% 1139    76.0KB/s   00:00
Certificate was added to keystore
Certificate was added to keystore
Certificates configured successfully
ImportCertToJavaKeyStore KeyStorePath: C:\certificates\server_keystore.p12 , KeyPass: password
Importing keystore C:\certificates\server_keystore.p12 to C:\Program Files\Eclipse Adoptium\jre-11.0.22.7-hotspot\lib\security\cacerts...
Existing entry alias wca4z-eashan-test-winaddi exists, overwrite? [no]:  yes
Entry for alias wca4z-eashan-test-winaddi successfully imported.
Existing entry alias root exists, overwrite? [no]:  yes
Entry for alias root successfully imported.
Existing entry alias combined exists, overwrite? [no]:  yes
Entry for alias combined successfully imported.
Import command completed:  3 entries successfully imported, 0 entries failed or cancelled

Warning:
The JKS keystore uses a proprietary format. It is recommended to migrate to PKCS12 which is an industry standard format using "keytool -importkeystore -srckeystore C:\Program Files\Eclipse Adoptium\jre-11.0.22.7-hotspot\lib\security\cacerts -destkeystore C:\Program Files\Eclipse Adoptium\jre-11.0.22.7-hotspot\lib\security\cacerts -deststoretype pkcs12".
WARNING: Waiting for service 'IBM Application Discovery Configuration Service
(IBMApplicationDiscoveryConfigurationService) (IBMApplicationDiscoveryConfigurationService)' to stop...
ImportCertToJavaKeyStore completed successfully
Add-RootCertificateToTrustedRoot CertificatePath C:\certificates\root.crt
Root certificate successfully added to trusted root certification authorities store.
Add-RootCertificateToTrustedRoot CertificatePath C:\certificates\combined.crt
Root certificate successfully added to trusted root certification authorities store.
TLS configuration completed successfully.
The script should have generated a certificates directory along with these files.
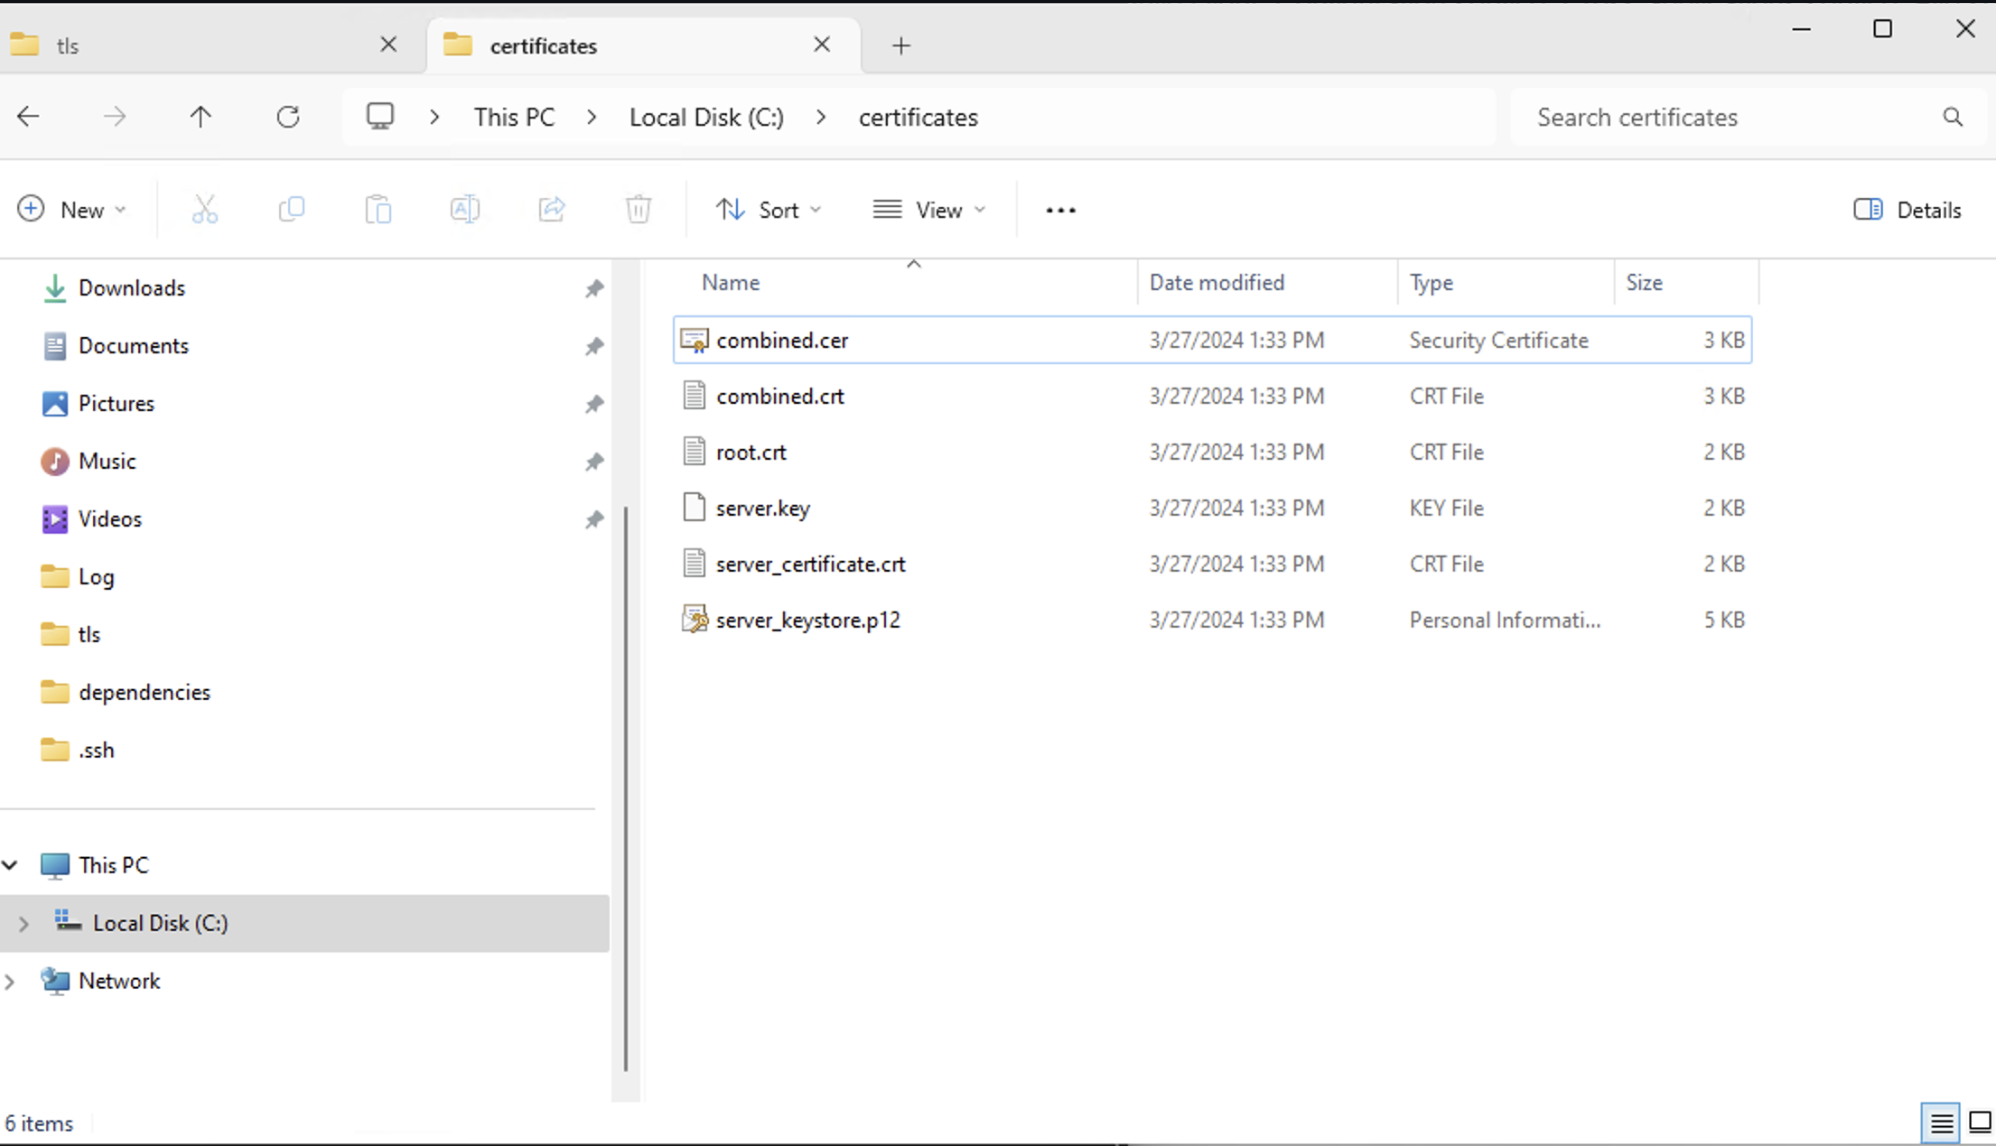
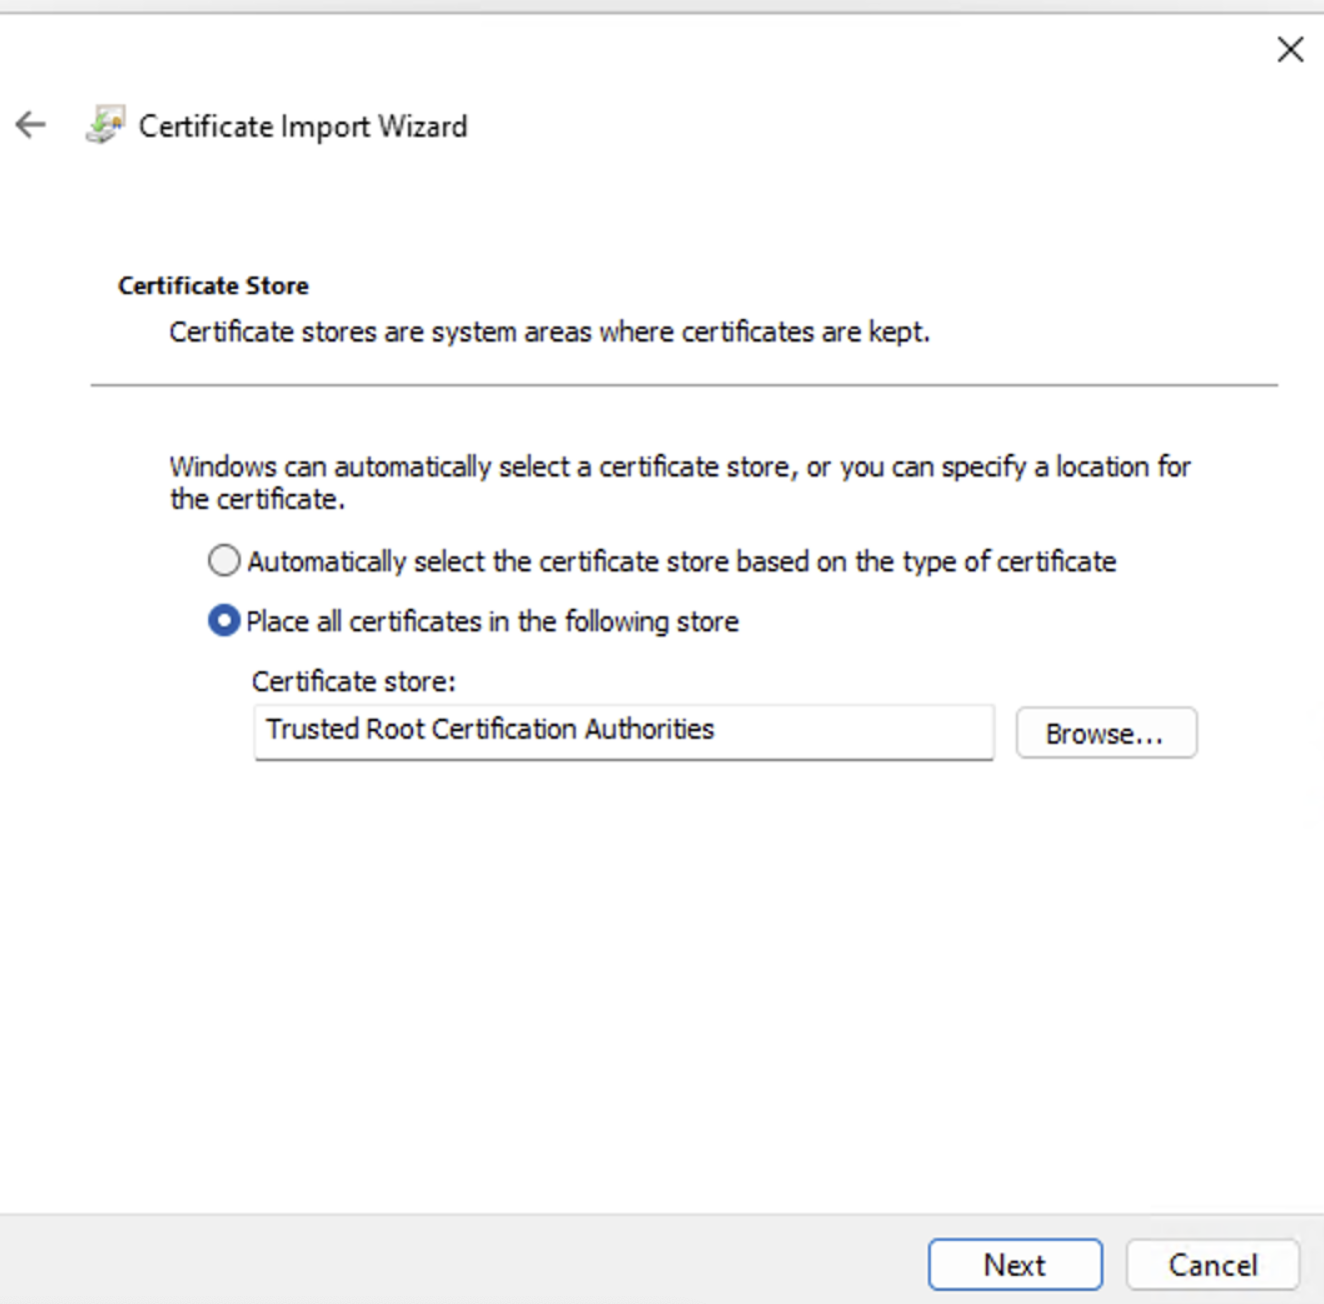
You now have to install the combined.cer by right clicking on the file and clicking on Install Certificate as Local Machine on
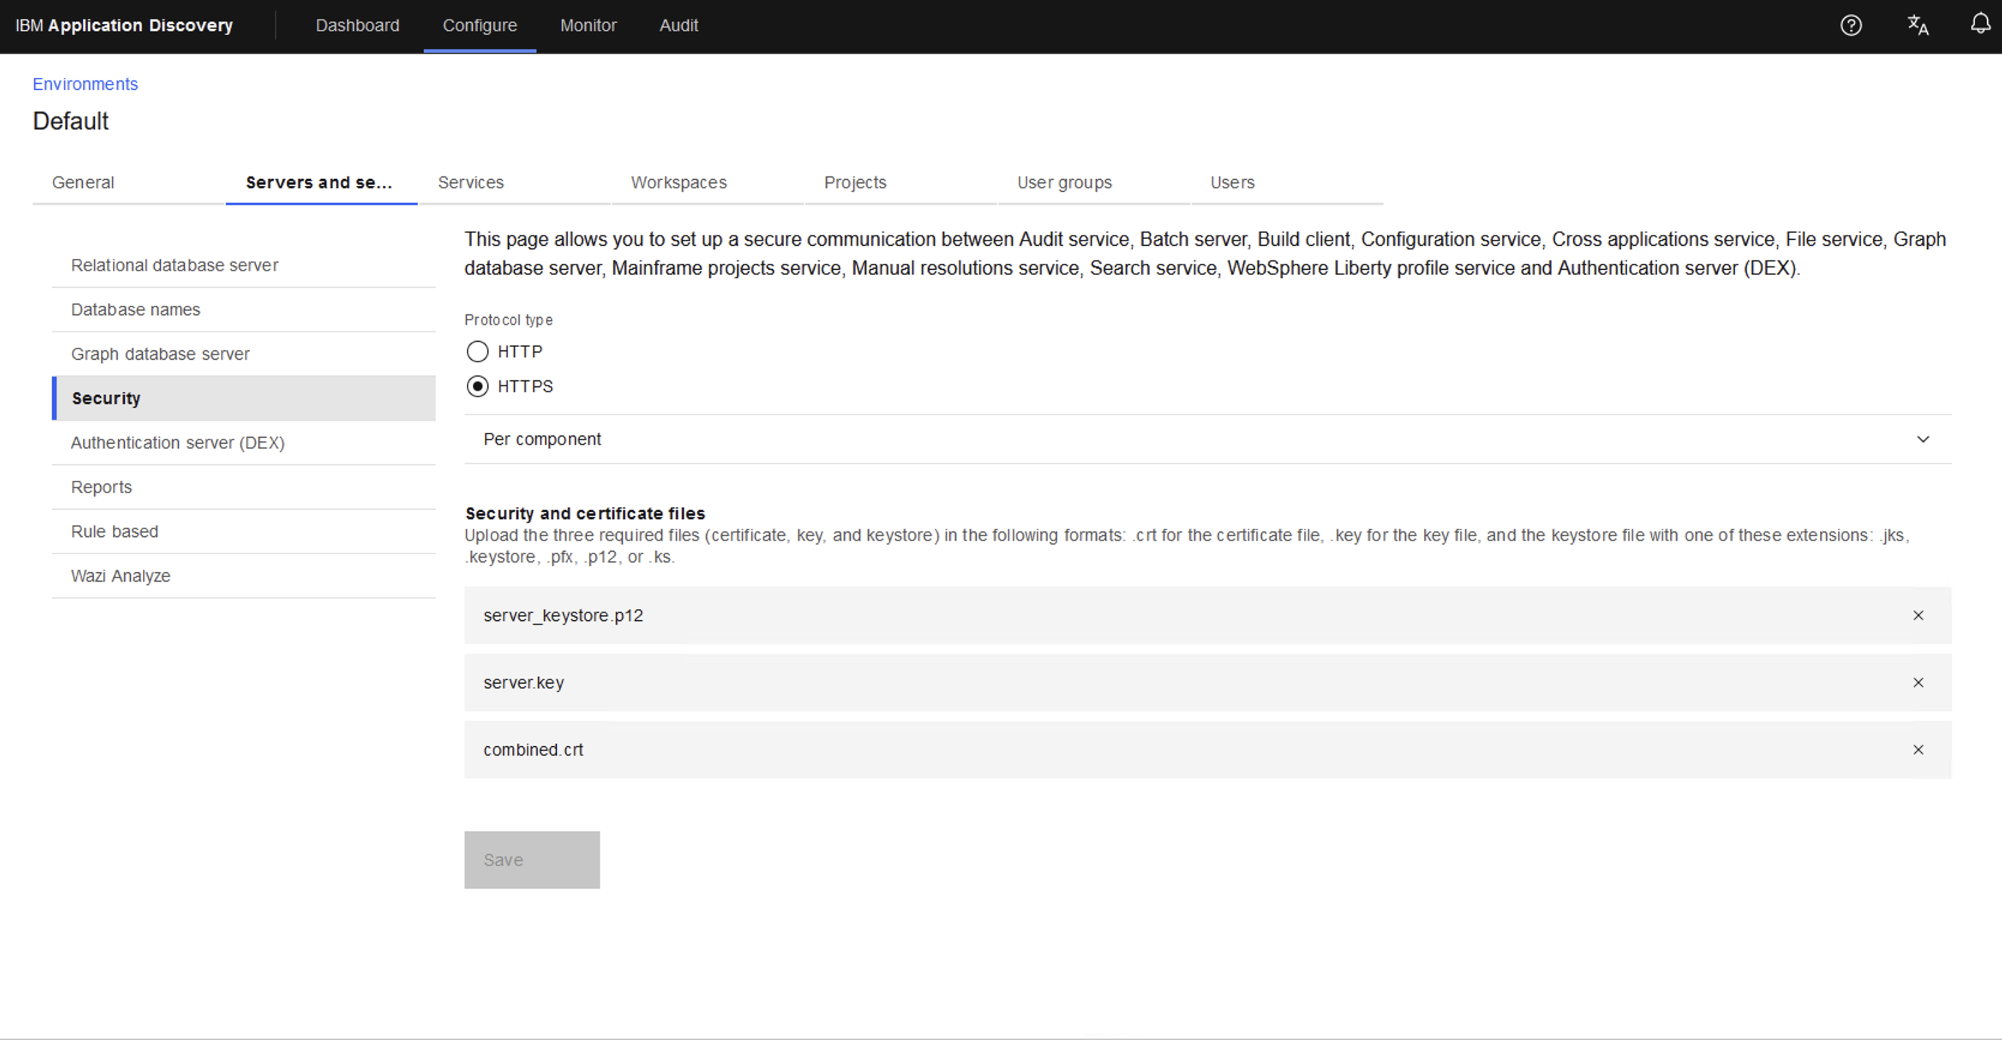
You can now upload these 3 files combined.crt, server_keystore.p12 and server.key on your IBM Application Discovery Configuration page as below. Click save. **Note A restart might be needed
These values should have changed automatically and if they have not please update the values.
You can update these fields to UTF-8 and the IP of the Addi host and the port etc.
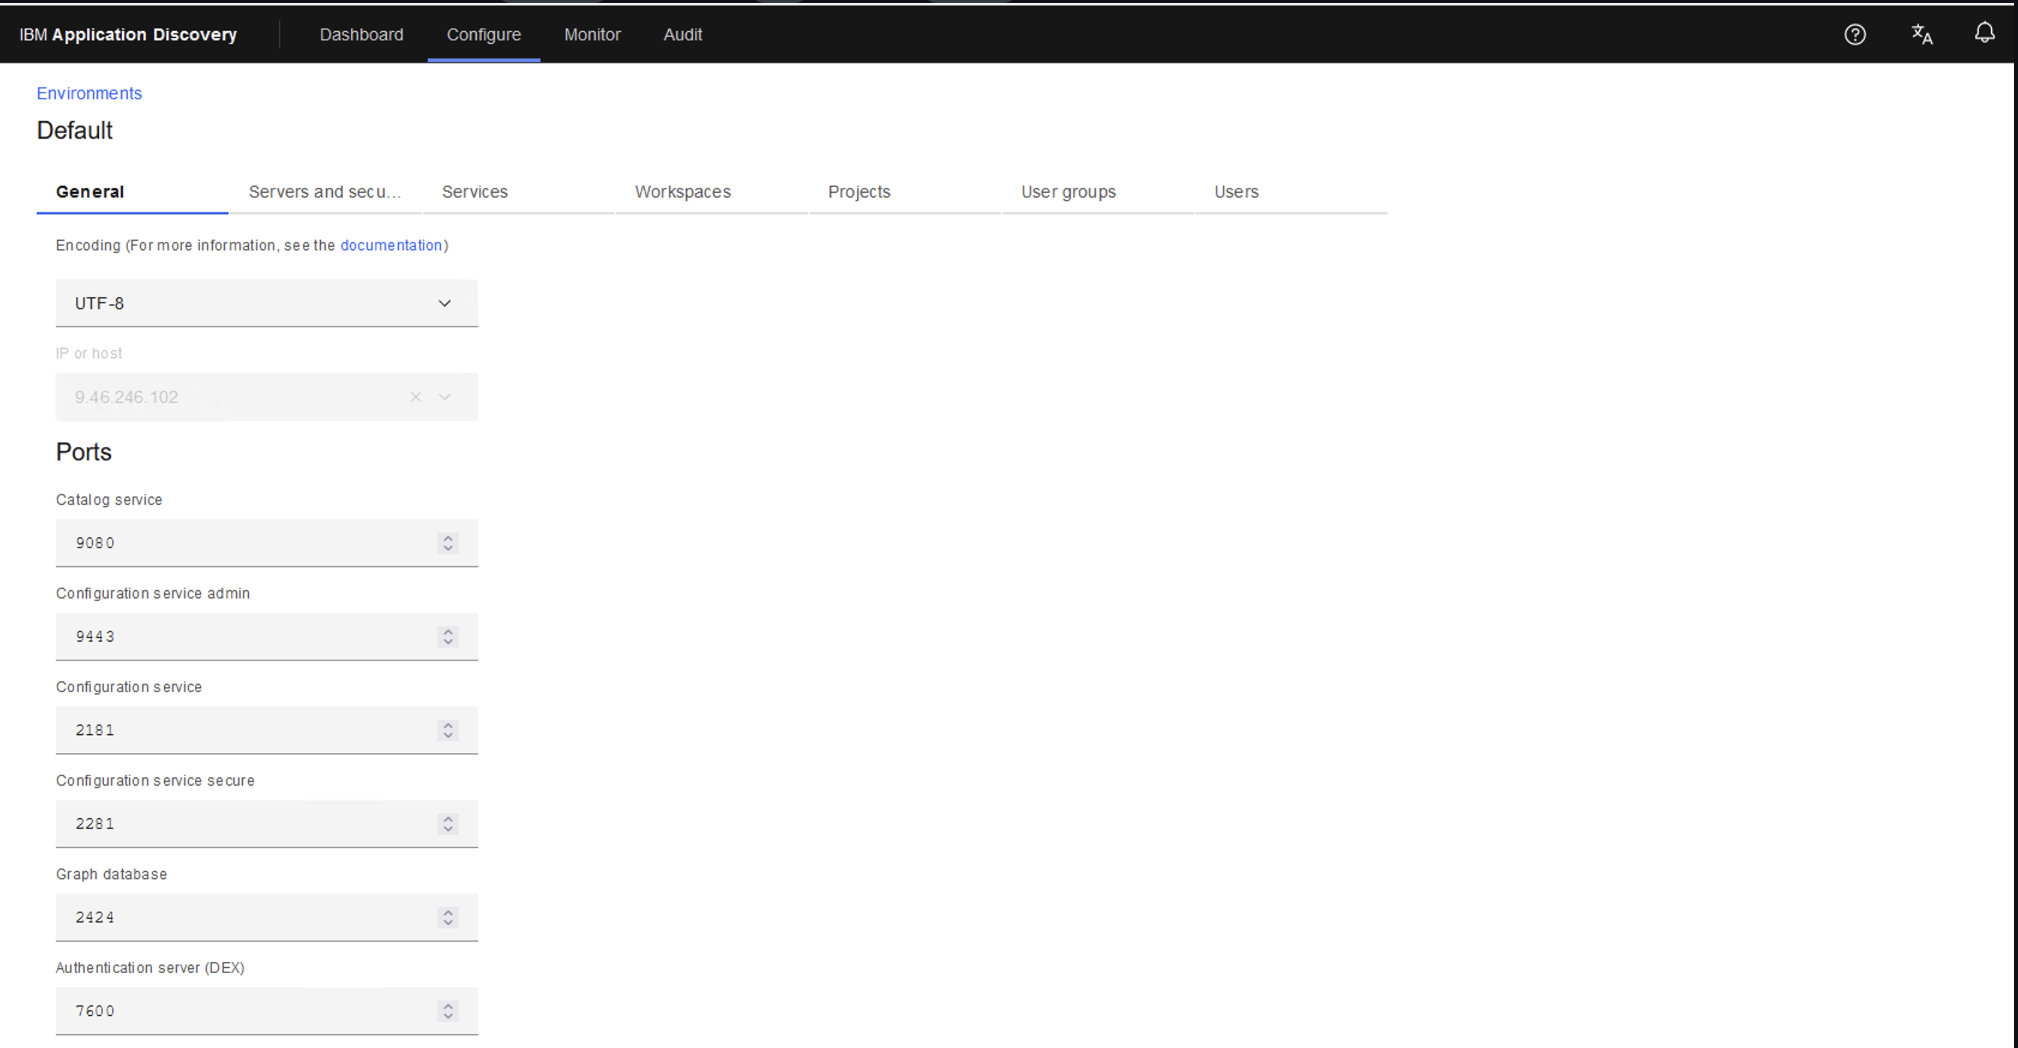
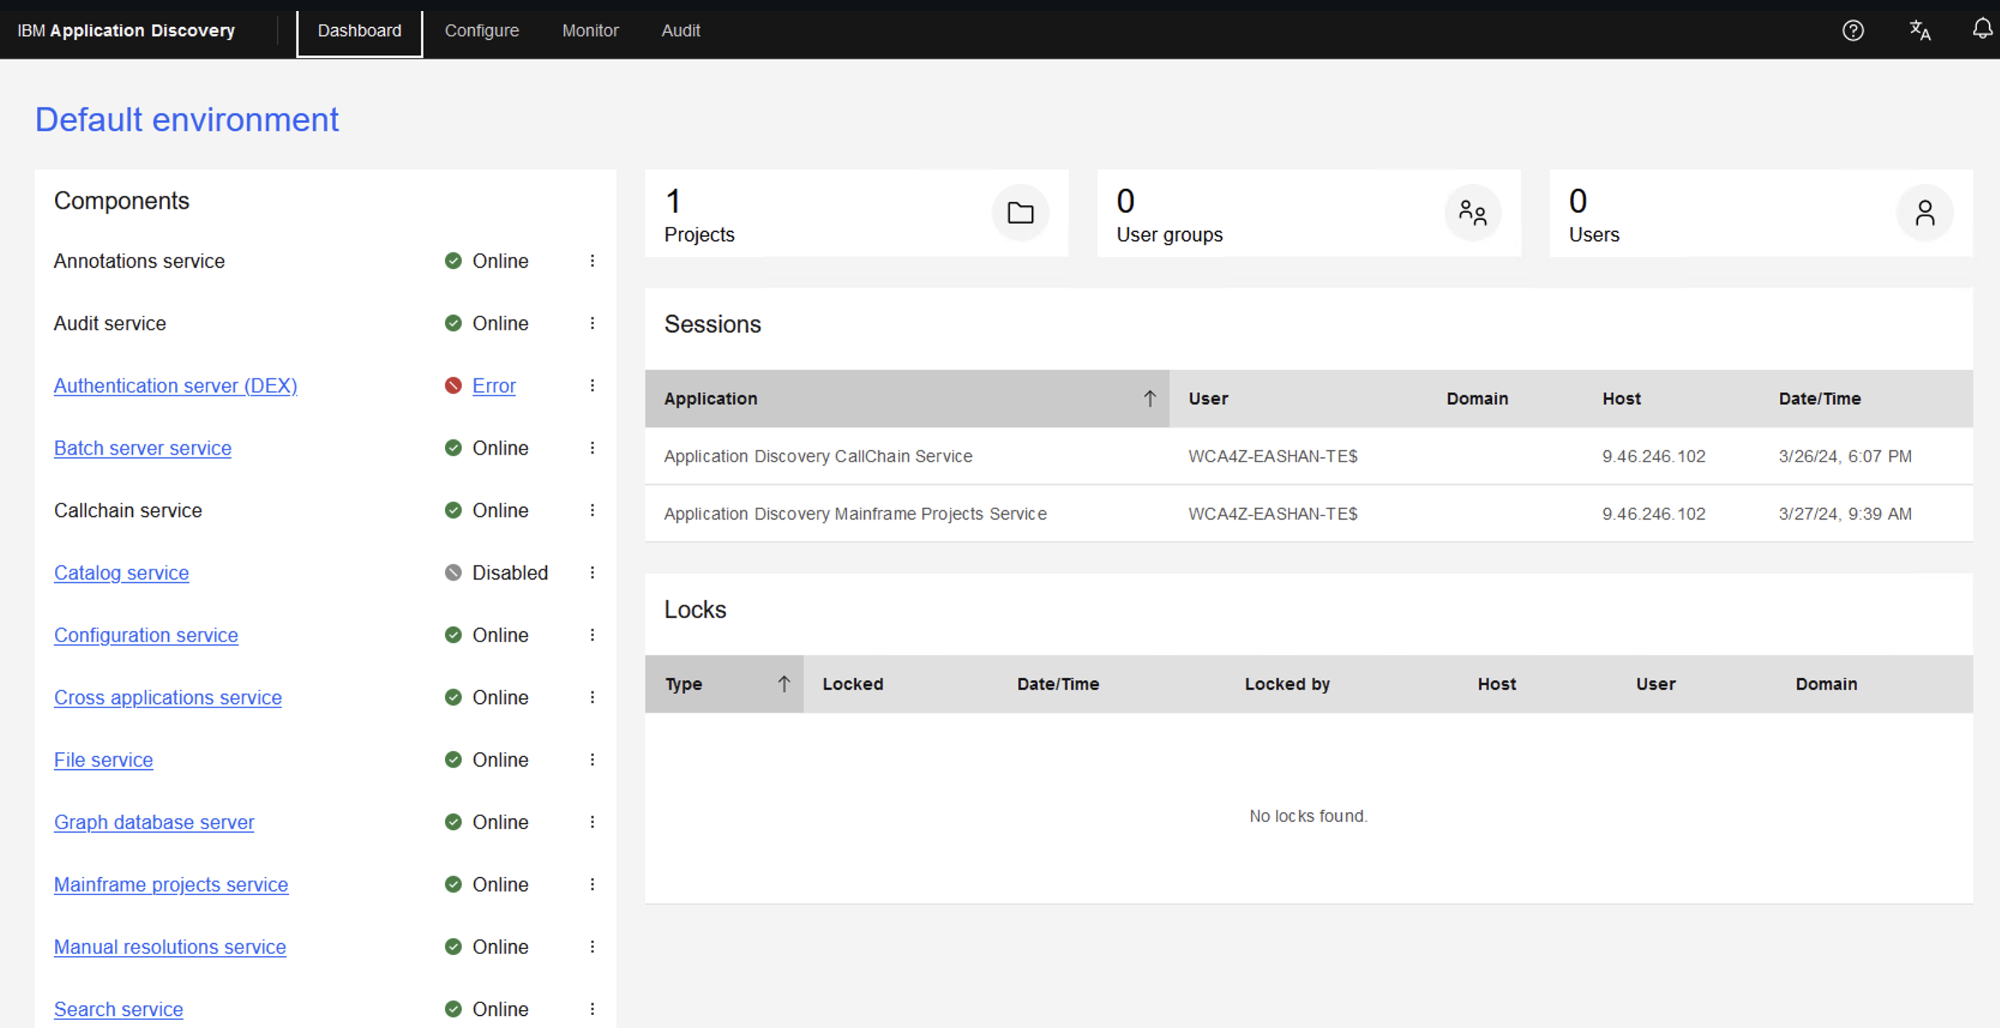
Validate everything is good. Configuration service should be online. Sometimes you have to restart the service.
DB2 Configuration
- Make sure ADDI is install and configured
- Make sure there is a non-lite version of DB2
Navigate to the appropriate file:
cd assets/papercuts/addi/db2_connection
Update the .env file within the directory
- FQDN="FQDN"
- DB2PORT="DB2PORT"
- DB2USER="DB2USER"
- DB2PASS="DB2PASS"
Refer to Cloud Database Section to locate the necessary values.
Run:
cd assets/papercuts/addi/connect_db2.ps1