Content Replication
Content Replication in FileNet
IBM FileNet Content Manager is able to replicate content in both synchronous and asynchronous modes.
Creating an Advanced Storage Device
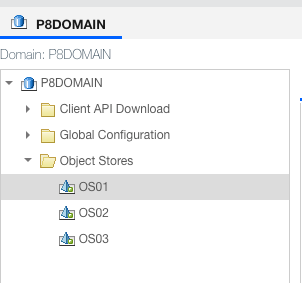
Advanced Storage Devices are attached to Advanced Storage Areas and will be the devices used for replication. To create an Advanced Storage Device, log into the Administrative Console for Content Platform Engine and select the Object Store you want to use.
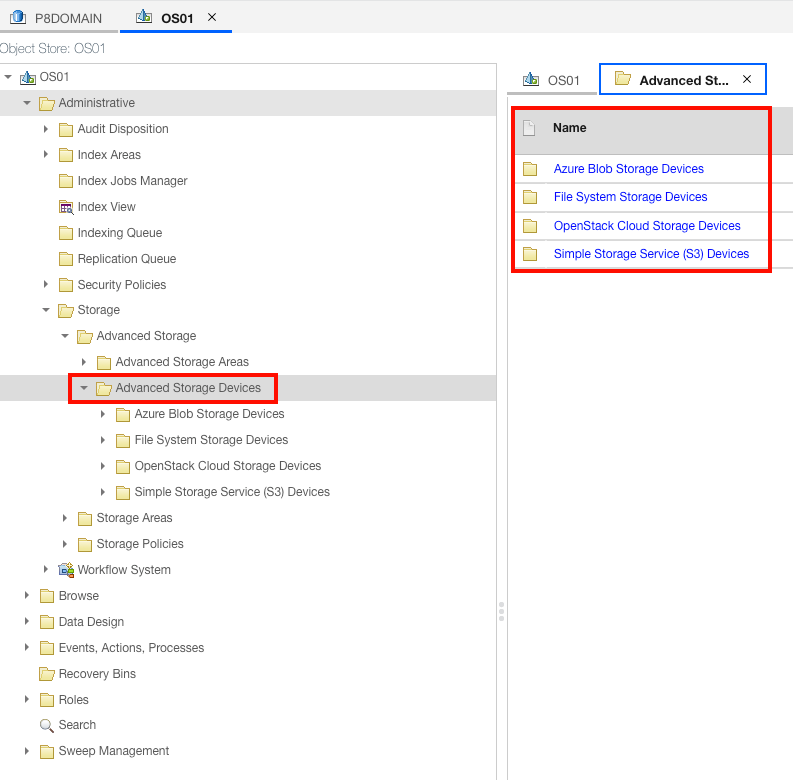
Once inside the Object Store, navigate to Administrative -> Storage -> Advanced Storage -> Advanced Storage Devices. Once inside the Advanced Storage Devices folder, you should see several different devices such as Azure Blog, File System, OpenStack, and Simple Storage Service (S3).
Before creating another Advanced Storage Device, there should already be a File System Storage device. This device was automatically configured during the initial FileNet installation. Let’s go to the File System Storage Device folder and verify.
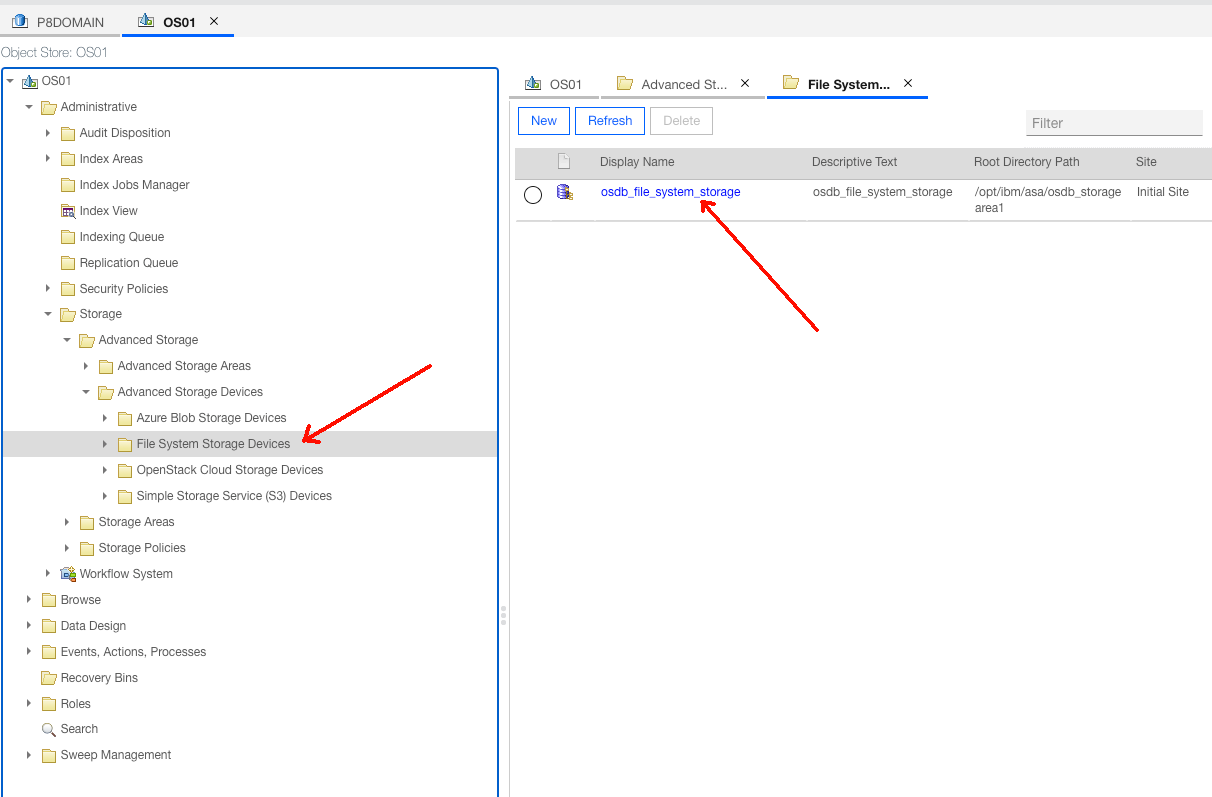
This storage is an AWS Elastic File Share (EFS) storage Persistent Volume (PV), and it is being attached to the pod FileNet is running on. In the image above we can see where this PV is mounted under "Root Direct Path". Also, because this device is using EFS, we get all the resilience that comes standard with AWS EFS. We will be using this device later in an Advanced Storage Area.
Now let’s create another Advanced Storage Device. We will be setting up an S3 Bucket as another Advanced Storage Device. To do this, in the same Advanced Storage Devices folder you should see another folder named Simple Storage Service (S3) Devices. Once there click on the "New" button to create a new S3 Advanced Storage Device.

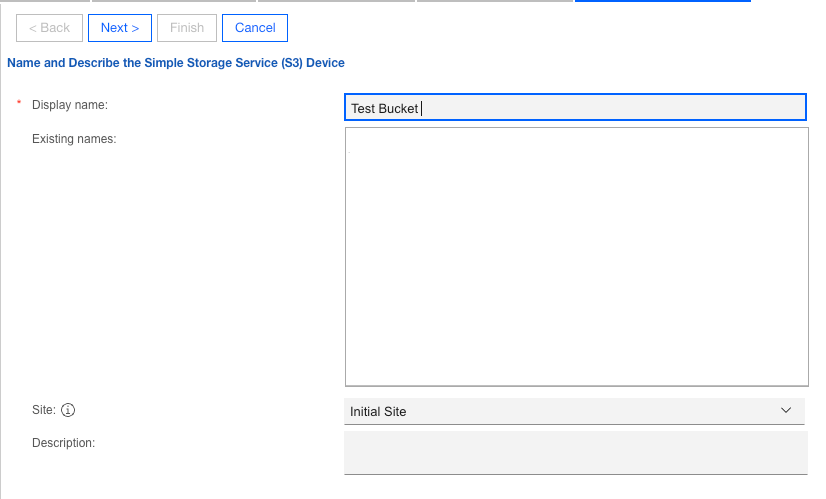
Next, we will be prompted to enter a display name for our S3 device in FileNet. This does not have to be the same name as your actual S3 bucket. This will be the device name within FileNet. Fill this out and select "Next".
On the next page, enter the details for your user Key ID, Secret Access Key, and the S3 bucket details. Then click "next".
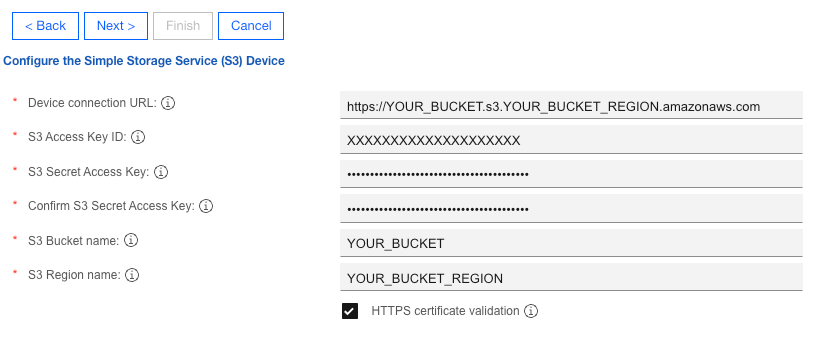
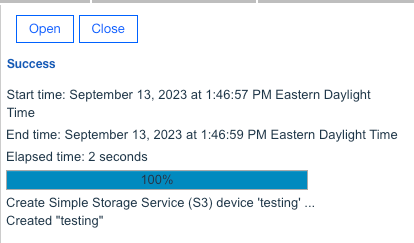
The following page will display all your selected options and entered values for the S3 configuration. Validate the information and if everything looks correct select "Finish". FileNet will then try to connect to that S3 bucket. When it successfully connects you should see a confirmation message.
Creating an Advanced Storage Area
Once we have connected Advanced Storage Devices to FileNet, we can create an Advanced Storage Area. Advanced Storage Areas handle how data is managed, replicated, and configured on Advanced Storage Devices. So, we associate one or more Advanced Storage Devices to an Advanced Storage Area and the Advanced Storage Area will manage those Advanced Storage Devices such as S3, EFS, etc.
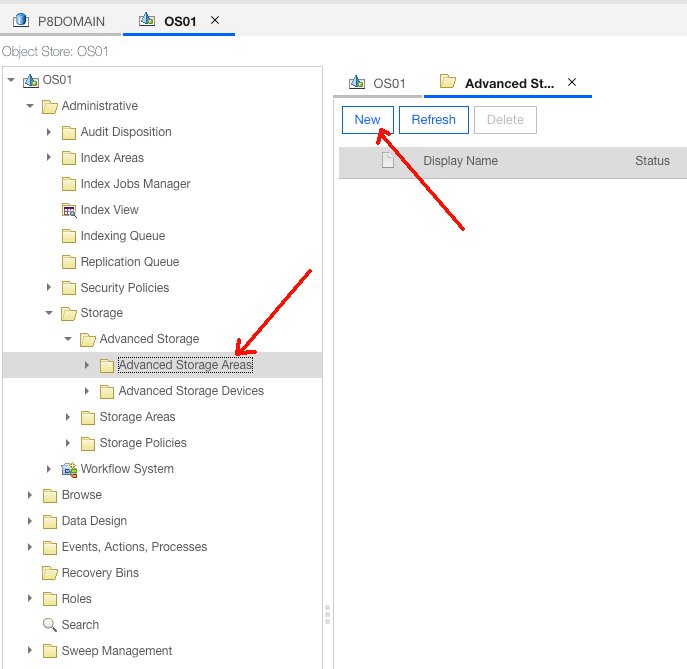
Now let’s create an Advanced Storage Area. Within the same Object Store you created your Advanced Storage Devices, navigate to Administrative -> Storage -> Advanced Storage -> Advanced Storage Areas. Once there select "New".
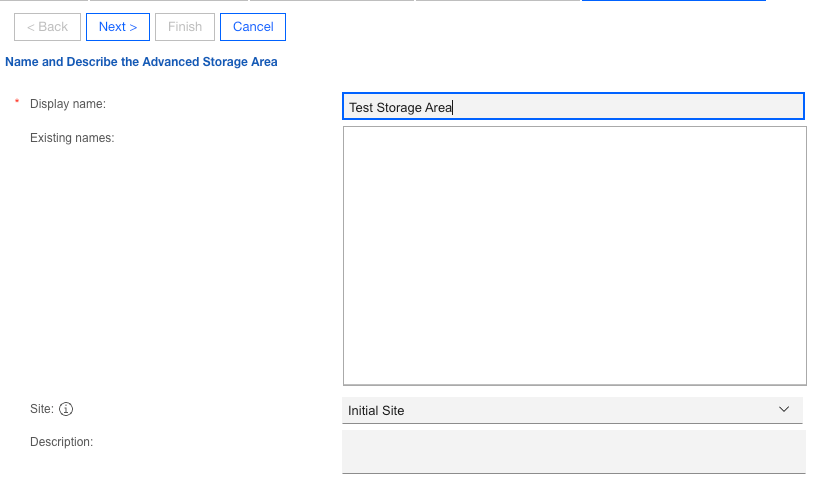
The next screen will prompt us for a name for the Advanced Storage Area. Enter any name that you like and then select "next".
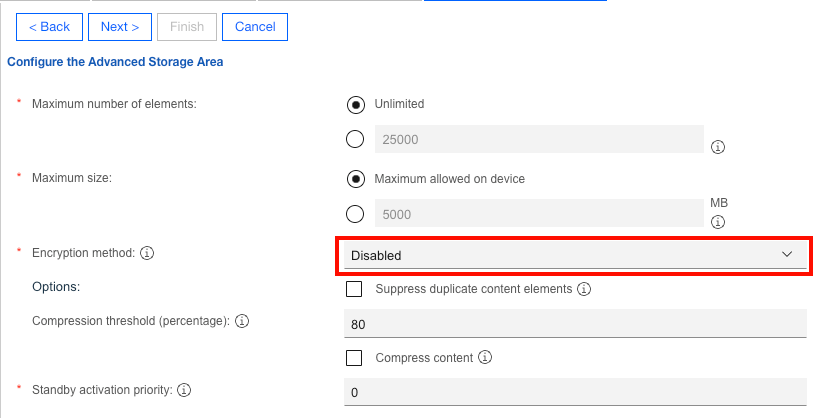
The next screen will ask some general questions about the Advanced Storage Area configuration. You should see an "Encryption Method" option. Set "Encryption Method" to disabled and leave the other settings default. Then select "next".
The next page will ask you what Advanced Storage Devices you want to add to the Advanced Storage Area. Advanced Storage Area refers to Advanced Storage Devices as "Replicas". In the section "Creating an Advanced Storage Device". There were two Advanced Storage Devices. One was an EFS File System Storage device that came preinstalled with the FileNet installation and another S3 Advanced Storage Device we added. Both should appear in the area named "Available Storage Replication Devices". Select the boxes next to those devices and a checkmark should appear.
Right above that option you should see "Required Synchronous Devices". This is where we set how many synchronous devices are required for a successful document upload. FileNet must write synchronously to this specific number of devices for the upload to complete and be successful. For now, we can put the value "1" here.

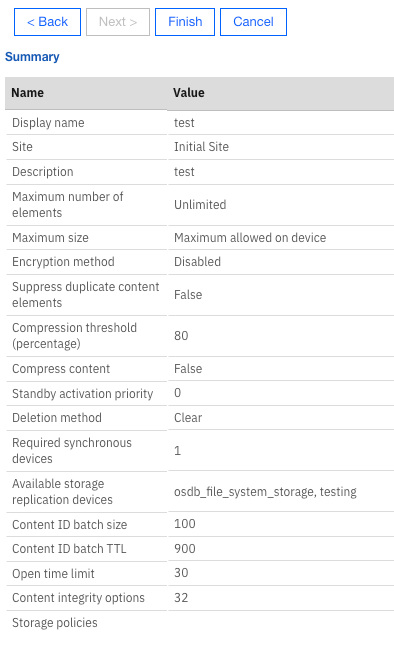
Keep selecting next and leaving all options default until you get to the Summary page. You will get a warning about not setting a storage policy. We can always set that later. Click "OK" on the warning. The Summary page displays all your configuration options. If everything looks correct click "Finish" at the top.
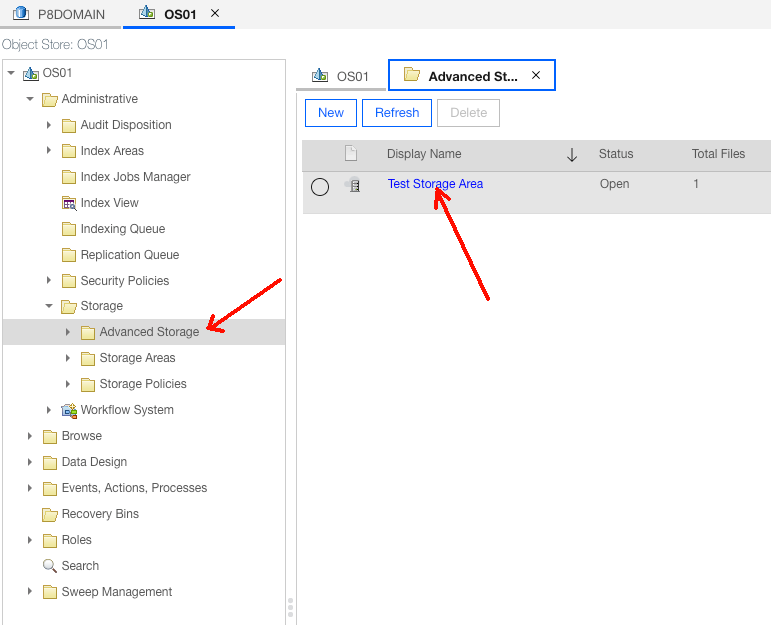
You should now see the newly created Advanced Storage Area in the list.

Configuring FileNet Replication
Once we have created an Advanced Storage Area and have attached Advanced Storage Devices, we can now configure the replication within that Advanced Storage Area. To configure the replication, navigate to Administrative -> Storage -> Advanced Storage -> Advanced Storage Areas. Here we should see the Advanced Storage Area we created in the previous section. Click on the name of the Advanced Storage Area.
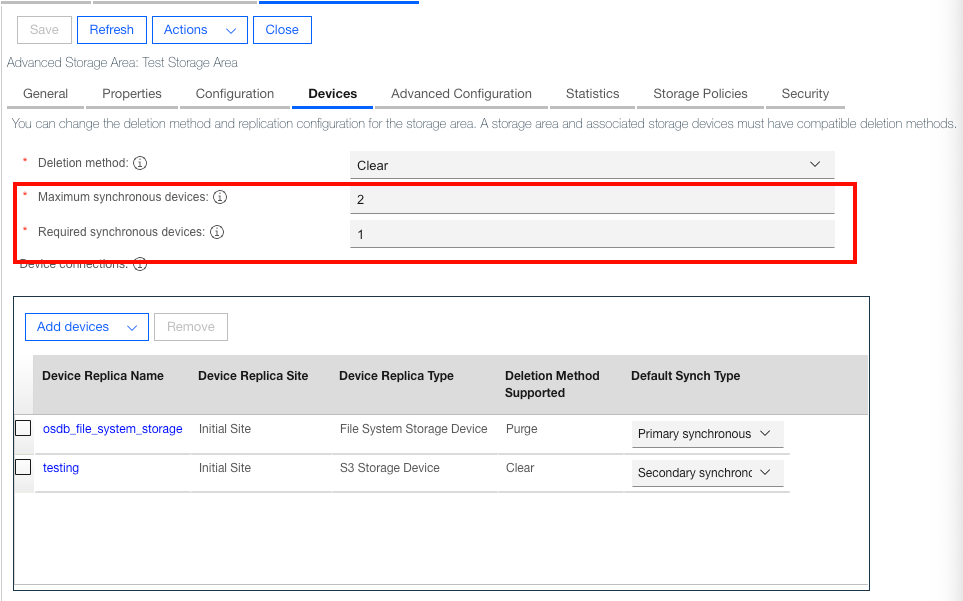
Once you clicked on the Advanced Storage Area, the page should now display the configuration settings for that Advanced Storage Area. Click on the "Devices" Tab.
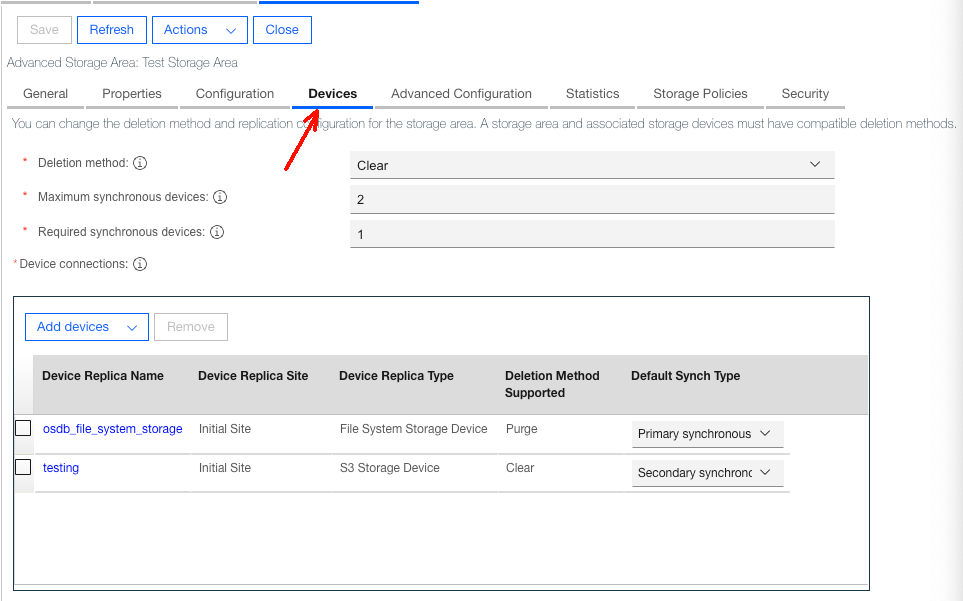
There will be several settings here but let’s start with "Maximum synchronous devices" and "Required synchronous devices". These settings act as an upper and lower limit on the number of synchronous devices written to when a document is uploaded. The "Maximum synchronous devices" tells FileNet that, when possible, write to this specified number of devices. "Required synchronous devices" tells FileNet that it must write to this specified number of devices for the upload to be successful. You can see how this creates a type of range for the synchronous replication.
Now let’s configure the replication for the individual devices in the Advanced Storage Area. In the same page you see a box named "Device Connections". In this box you should see the Advanced Storage Devices connected to this Advanced Storage Area. We should see the devices that we added in the previous sections. To the right of each of these devices, we should see an option called "Default Synch Type".
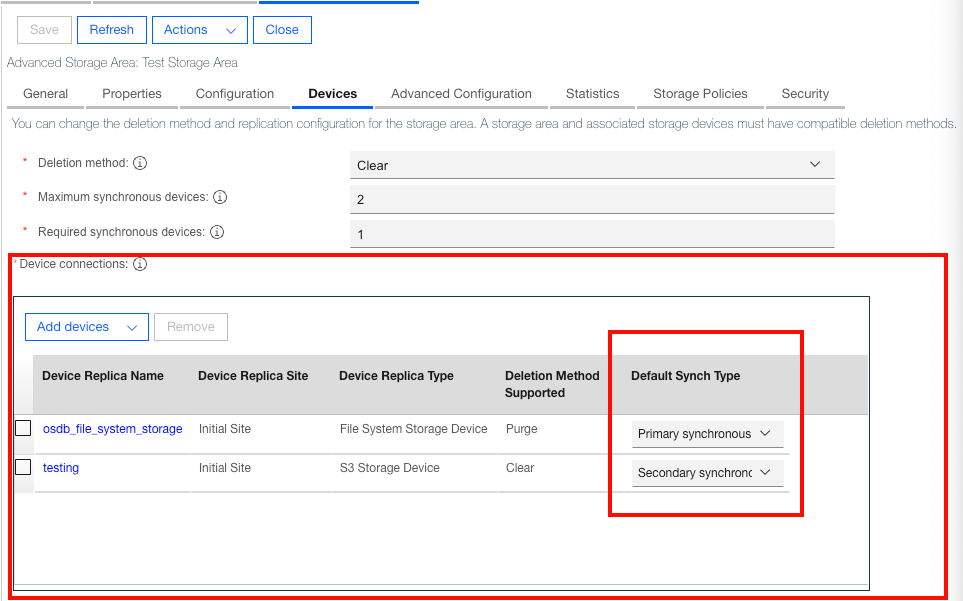
This option controls the device replication priority and type. There are three Default Synch Types:
- Primary Synchronous - They are the primary, priority devices that FileNet will try to write synchronous operations to.
- Secondary Synchronous - If FileNet has exhausted all devices marked "Primary Synchronous", FileNet will then start using devices marked as "Secondary Synchronous" for synchronous write operations.
- Asynchronous - Devices with this type are always written to asynchronously and are not part of synchronous write operations.
This logic is further demonstrated in the following diagram:
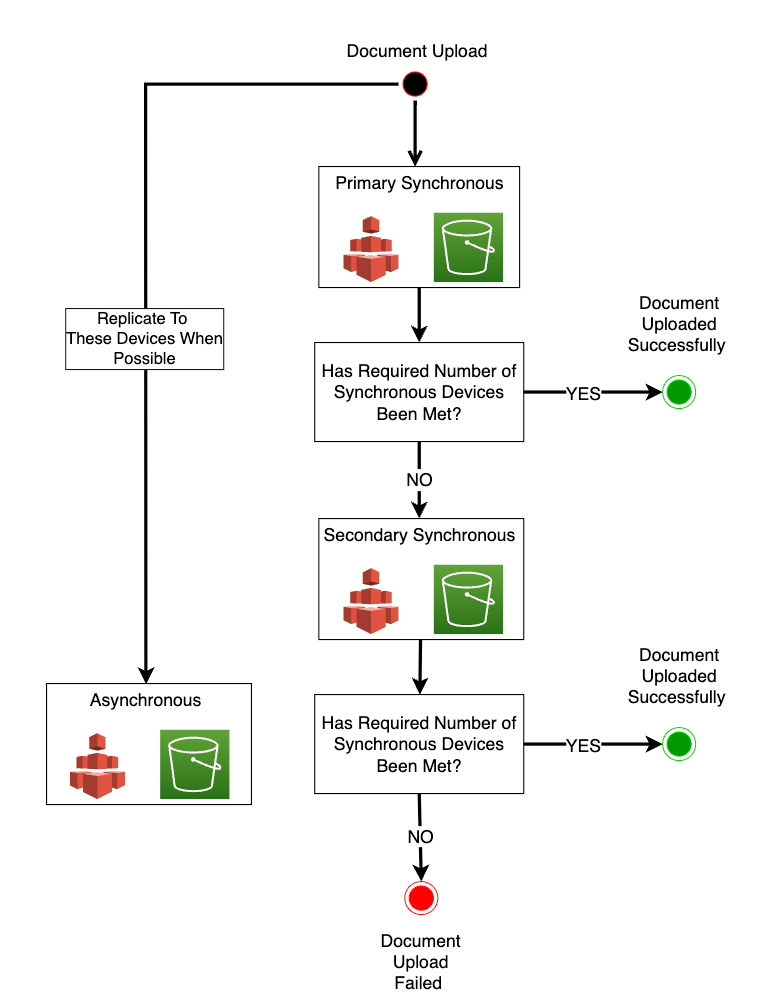
**NOTE: This diagram is meant to illustrate Default Synch Type priority and logic. This diagram does not take into account settings like maximum number of synchronous devices, how FileNet handles extra storage devices, or other FileNet factors and settings.
Asynchronous replication
Synchronous replication is discussed in the previous section Configuring FileNet Replication.
Content can also be written to replicas asynchronously with the content replication request sweep. Asynchronous replication is used under the following conditions:
- A storage device connection for a replica is explicitly configured for asynchronous replication.
- If the maximum number of synchronous replicas has already been reached, but there are other primary or secondary designated replicas available, then, for performance purposes, the advanced storage area writes asynchronously to the remaining replicas.
- A synchronous write attempt to a replica fails. For example, if a primary replica fails, but the required number of primary replicas is satisfied, the advanced storage area places the write request to the failed replica in the replication sweep queue. The replication queue sweep writes the content after the failed replica is restored.
We mentioned that content is written asynchronously with content replication request sweeps. Sweeps are types of background jobs that run within FileNet. Once an object meets a configured criteria, the sweep performs an action on the object. There are several types of Sweeps in FileNet, and you can even create custom Sweeps. But for replication, this task is handled by content replication request sweeps. Content replication request sweeps are a type of Queue Sweep. Once FileNet has determined an asynchronous replication task, content replication request sweeps will try to write asynchronously to the replicas that meet the conditions that we previously discussed. Depending on factors within FileNet, content replication request sweeps may try to carry out that asynchronous write immediately or it might put it in a queue to be processed later. There are many factors that might cause the asynchronous job to be put in a queue, such as capacity, device availability, scheduling and so on.
Now that we have discussed the role of Sweeps in FileNet and how asynchronous write operations are handled by content replication request sweeps, let’s go into the Admin Console and view content replication request sweeps. Withing the Admin Console, select the Object Store that you used to create you Advanced Storage Area and Devices. Once inside that Object Store, navigate to Sweep Management -> Queue Sweeps -> Content Replication Sweep.
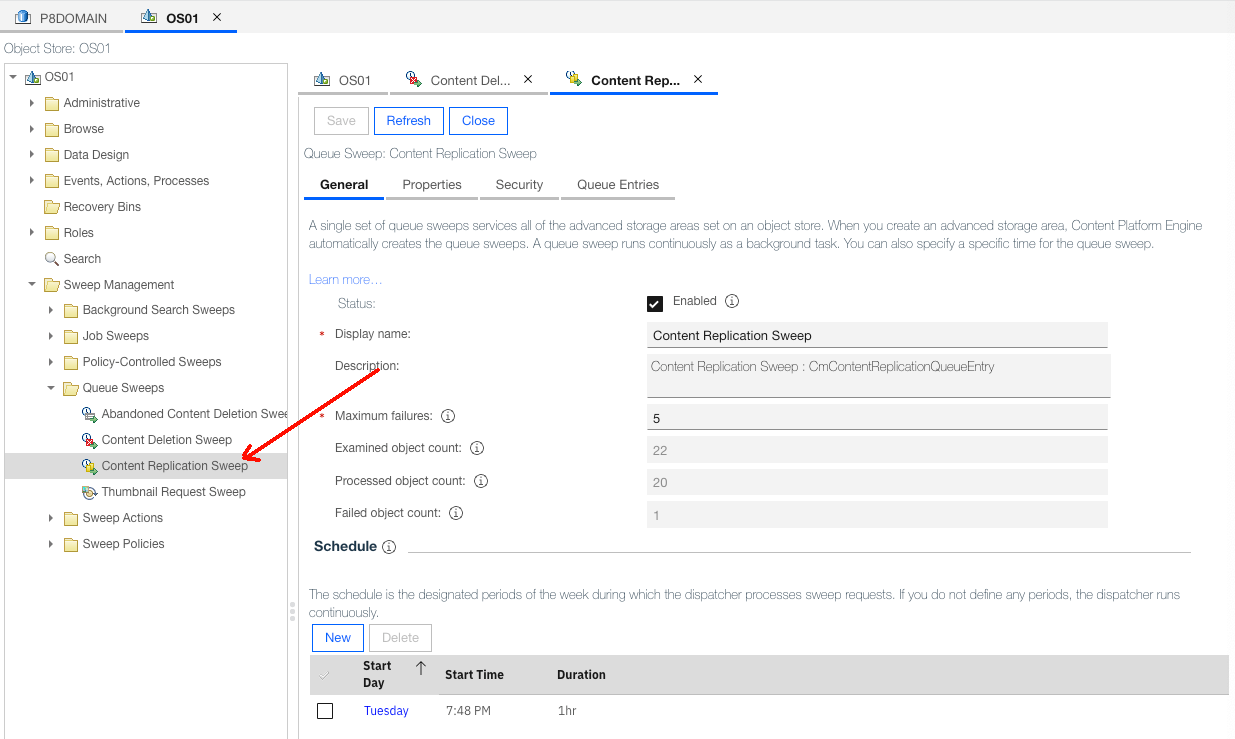
Once here, we can configure how the Content Replication Sweep runs. For instance, we can set a schedule for the Content Replication Sweep. If we only want asynchronous write operations to occur at certain times of the day, we can set that here.
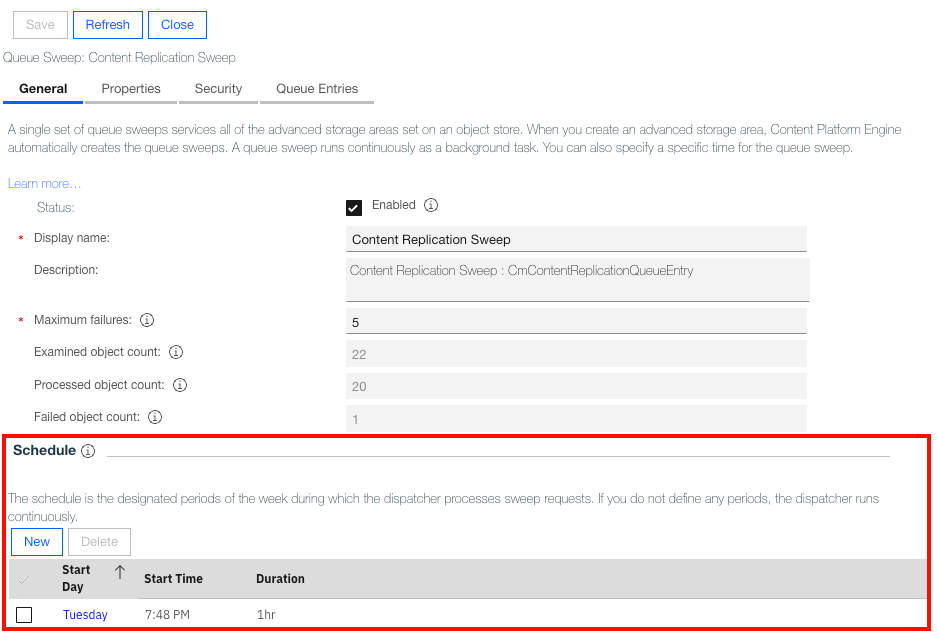
Asynchronous jobs waiting to be executed by the Content Replication Sweep remain in the "Queue Entries" within the Content Replication Sweep. This queue shows upcoming asynchronous write operations along with other information such as status, failure count, etc. This information can be found by selecting the Queue Entries" tab within the Content Replication Sweep.

Testing Synchronous/Asynchronous Replication in FileNet
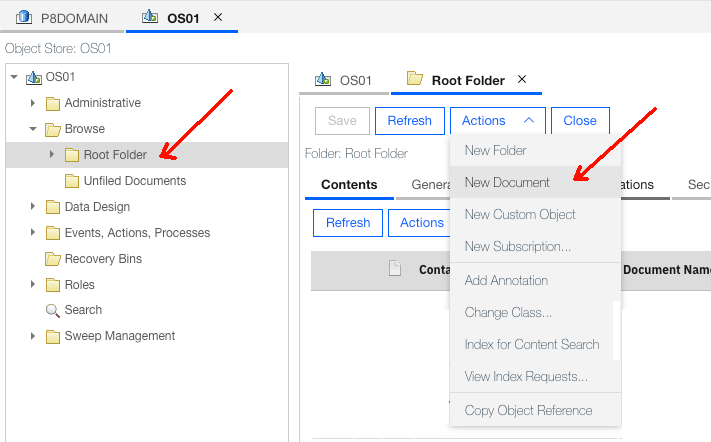
To test our synchronous/asynchronous configurations we can upload a document to FileNet. Withing the Admin Console, select the Object Store that you used to create you Advanced Storage Area and Devices. Then navigate to Browse. Within browse there will be a folder called "Root Folder". We can upload a document here or create another folder and upload it there. For our testing, lets upload to the Root Folder. Click on the Root Folder to enter. Once inside the Root Folder Select the "Actions" dropdown and select "New Document".
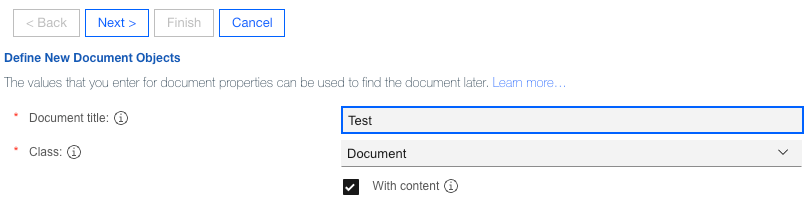
Give a name to the document and select "next".
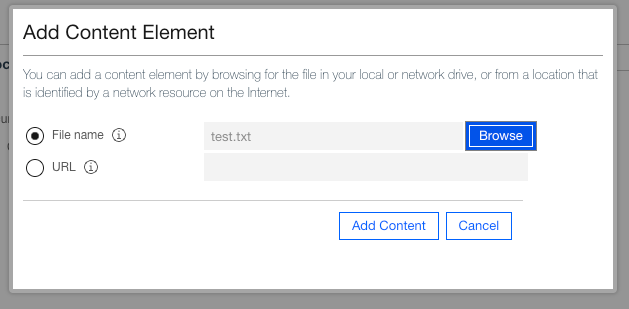
We will now need to add content to the document. To add a file, click "Add" in the "Content Elements". A pop-up window should appear named "Add Content Element". Add any file here and then select "Add Content" button on the bottom. The file we selected should appear in the Content Elements. Then select "Next".

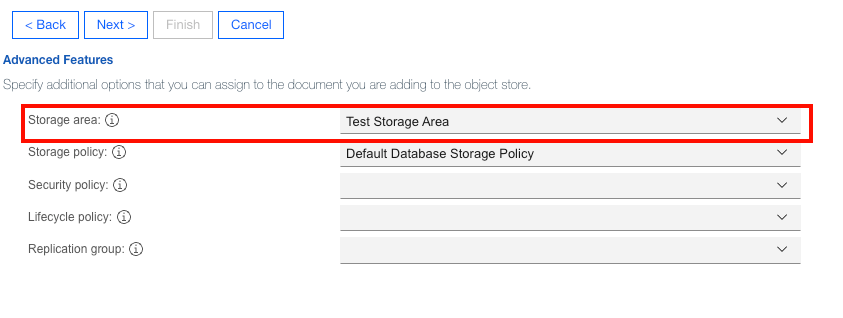
Keep selecting next and leaving all settings default until you get to the "Advanced Features" page. Here we need to select the Advanced Storage Area we created in the previous section. Once we have selected the storage area, select "next".
The next page will be the summary page. The Summary page displays all your configuration options. If everything looks correct click "Finish" at the top.
You can now check your storage devices to verify the document was uploaded. Asynchronous writes may have the appearance of synchronous writes at times. This is because there is nothing like a schedule, capacity, or other limiting configurations that would cause the asynchronous write operation to be put into the queue. So, the content replication request sweep immediately executes the asynchronous write operation.