Guardium Insights Installation
Obtaining the CASE bundle for GI
Export the following env vars. This assumes we have been installing in the openshift-marketplace namespace.
As of this writing, we are using Guardium Insights version 3.5.0 which uses the 2.5.0 bundle file.
export CP_REPO_USER="cp"
export CP_REPO_PASS=<Your Password / Entitlement Key to cp.icr.io>
export NAMESPACE="openshift-marketplace"
export CLUSTERNAME="<your-cluster-name>"
export CASE_NAME=ibm-guardium-data-security-center
export CASE_VERSION=2.6.0
export LOCAL_CASE_DIR=$HOME/.ibm-pak/data/cases/$CASE_NAME/$CASE_VERSION
export GI_INVENTORY_SETUP=install
export IBMPAK_LAUNCH_SKIP_PREREQ_CHECK=true
Save the CASE bundle locally
oc ibm-pak get $CASE_NAME \
--version $CASE_VERSION \
--skip-verify
This will download the CASE bundle to $HOME/.ibm-pak/data/cases/ibm-guardium-data-security-center/2.6.0
Install the GI Operator
Set the context to the correct namespace
kubectl config set-context --current --namespace=${NAMESPACE}Collect the node names
In most installations you can label specific nodes to be used for DB2. In our case, we are just going to label all the compute nodes as part of the pre-install.
NODES=$(kubectl get nodes -o jsonpath='{.items[*].metadata.name}')
NODES=$(echo $NODES | tr ' ' ',')
echo $NODES
Should return output similar to this
ip-192-168-10-208.ec2.internal,ip-192-168-17-40.ec2.internal,ip-192-168-23-220.ec2.internalRun the pre-install
oc ibm-pak launch $CASE_NAME \
   --version $CASE_VERSION \
   --inventory $GI_INVENTORY_SETUP \
   --action pre-install \
   --namespace $NAMESPACE \
   --args "-n ${NAMESPACE} -h ${NODES} -t false -l true -e true"
This should return the following
Welcome to the CASE launcher
Attempting to retrieve and extract the CASE from the specified location
[✓] CASE has been retrieved and extracted
Attempting to validate the CASE
[✓] CASE has been successfully validated
Attempting to locate the launch inventory item, script, and action in the specified CASE
[✓] Found the specified launch inventory item, action, and script for the CASE
Skipping CASE defined prerequisite checks for the specified action
Executing inventory item install, action preInstall : launch.sh
-------------Installing dependent GI preinstall: /var/folders/tp/zkf5_qld1wn_ms51xys8d0m00000gn/T/extractedCASELauncher1330610821/ibm-guardium-insights-------------
PRE-INSTALL VALUES:
 -n openshift-marketplace -h ip-192-168-10-208.ec2.internal,ip-192-168-17-40.ec2.internal,ip-192-168-23-220.ec2.internal -t false -l true -e true
Warning : One or more optional parameters not passed, default values will be used
OpenSSL is working with parameters -pbkdf2
#####IBM Guardium Insights Pre-installation: Starting Preparation#####
The system properties of the nodes
Skipping due to NON_OCP being true
The system properties of the nodes
Skipping the system properties due to NON_OCP being true
node/ip-192-168-10-208.ec2.internal labeled
node/ip-192-168-17-40.ec2.internal labeled
node/ip-192-168-23-220.ec2.internal labeled
Skipping data node(s) tainting.
Node ip-192-168-10-208.ec2.internal already labelled.
Node ip-192-168-17-40.ec2.internal already labelled.
Node ip-192-168-23-220.ec2.internal already labelled.
##### IBM Guardium Insights Pre-installation: Custom SCC creation#####
Skipping custom scc creation
#####IBM Guardium Insights Pre-installation: Ingress Certificate Recreation#####
Overwrite existing secrets mode: no
--------------------------------------------------------------
Starting: IBM Guardium Insights: Ingress creation script.
Skipping certificate generation. Certificate creation is handled by the Guardium Insights Deployment.
Completed: IBM Guardium Insights : Ingress creation script.
--------------------------------------------------------------
[✓] CASE launch script completed successfully
Verify the node labeling
kubectl get nodes --no-headers -o custom-columns=":metadata.name" | xargs -I {} sh -c 'oc describe node {} | grep db2 | grep -v $NAMESPACE'Should return
                    icp4data=database-db2wh
                    icp4data=database-db2wh
                    icp4data=database-db2wh
Install the operator catalogs
oc ibm-pak launch $CASE_NAME \
   --version $CASE_VERSION \
   --inventory $GI_INVENTORY_SETUP \
   --action install-catalog \
   --namespace $NAMESPACE \
   --args "--inputDir ${LOCAL_CASE_DIR}"
Verify the Catalog Sources were installed
kubectl get catsrcOutput should look like this:
NAME                                     DISPLAY                                  TYPE   PUBLISHER   AGE
cloud-native-postgresql-catalog          Cloud Native Postgresql Catalog          grpc   IBM         3d21h
ibm-db2uoperator-catalog                 IBM Db2U Catalog                         grpc   IBM         3m18s
ibm-guardium-insights-operator-catalog   IBM Security Guardium Insights Catalog   grpc   IBM         2m31s
ibm-redis-cp-operator-catalog            IBM Redis CP Catalog                     grpc   IBM         2m37s
opencloud-operators                      IBMCS Operators                          grpc   IBM         3d21h
Install the Operators
oc ibm-pak launch $CASE_NAME \
   --version $CASE_VERSION \
   --inventory $GI_INVENTORY_SETUP \
   --action install-operator \
   --namespace ${NAMESPACE} \
   --args "--registry cp.icr.io --user ${CP_REPO_USER} --pass ${CP_REPO_PASS} --secret ibm-entitlement-key --inputDir ${LOCAL_CASE_DIR}"
Verify the installation of the operators
kubectl get subOutput should look like this:
NAME                                          PACKAGE                          SOURCE                                   CHANNEL
cloud-native-postgresql                       cloud-native-postgresql          cloud-native-postgresql-catalog          stable
ibm-common-service-operator                   ibm-common-service-operator      opencloud-operators                      v4.6
ibm-db2uoperator-catalog-subscription         db2u-operator                    ibm-db2uoperator-catalog                 v110509.0
ibm-events-operator                           ibm-events-operator              opencloud-operators                      v3
ibm-guardium-insights-operator-subscription   ibm-guardium-insights-operator   ibm-guardium-insights-operator-catalog   v3.6
ibm-idp-config-ui-operator                    ibm-commonui-operator-app        opencloud-operators                      v4.4
ibm-im-operator                               ibm-iam-operator                 opencloud-operators                      v4.5
ibm-platformui-operator                       ibm-zen-operator                 opencloud-operators                      v4.4
ibm-redis-cp-operator-catalog-subscription    ibm-redis-cp                     ibm-redis-cp-operator-catalog            v1.1
operand-deployment-lifecycle-manager-app      ibm-odlm                         opencloud-operators                      v4.3
Deploying an instance of Guardium Insights
Content heavily borrowed from here
Configure DNS resolution (Optional)
If you previously used AWS Route 53 to configure DNS resoluion as part of an insecure hostname configuration, then follow these instructions to add additional routing that is needed for the Guardium Insights deployment.
In AWS Route 53, open the previously created private hosted zone created during cluster build.
As we did previously, first find the private cluster IP address of the load balancer under CLUSTER-IP.
kubectl get service --namespace ingress-nginx ingress-nginx-controllerNAME TYPE CLUSTER-IP EXTERNAL-IP PORT(S) AGE
ingress-nginx-controller LoadBalancer 10.100.24.243 a091398910dbf4ad8aeb2f3f0e864311-916cbf853e32c1d5.elb.us-east-2.amazonaws.com 80:31369/TCP,443:30370/TCP 20hCapture that CLUSTER-IP value for the next steps.
Back on the hosted zone details page, click the Create record button.
We want to create a record that routes guardium.apps.gi.guardium-insights.com to the private IP address captured above.
Click Create Records.
Guardium CR
This is a usable example. Copy this to a new yaml file. The name should be the cluster-name and the namespace should be openshift-marketplace.
We want to set the following values in this file
  name: gi-eks
  namespace: openshift-marketplace
And under ingress set the hostname (guardium.apps.gi.thinkforward.work in our example) and make sure the FQDN is the one we set.
      ingress:
        hostName: guardium.apps.gi.thinkforward.work
domainName: apps.gi.thinkforward.workIf using the insecure hostname, use the following values instead.
      ingress:
        hostName: guardium.apps.gi.guardium-insights.com
        domainName: apps.gi.guardium-insights.com
Also we will be setting the RWO storage classes to use the gp3 block storage class we created ebs-gp3-sc
This will install an instance with the sizing set to values-small
gdsc-custom-eks.yaml
cat <<EOF > gi-custom-eks.yaml
apiVersion: gi.ds.isc.ibm.com/v1
kind: GuardiumDataSecurityCenter
metadata:
  name: ${CLUSTERNAME}
  namespace: ${NAMESPACE}
spec:
  version: 3.6.0
  license:
    accept: true
    licenseType: "L-QABB-9QRLFB"
  guardiumGlobal:
    deploymentOptions:
      prometheusType: disabled
    fsGroupGid: 0
    networkPolicyPodToPod:
      enabled: false
    backupsupport:
      enabled: "false"
      name: backup-pvc-support
    image:
      insightsPullSecret: ibm-entitlement-key
      repository: cp.icr.io/cp/ibm-guardium-data-security-center
    size: values-small
    instance:
      ingress:
        hostName: guardium.${HOSTNAME}
        domainName: ${HOSTNAME}
      ics:
        namespace: ${NAMESPACE}
        registry: common-service
    storageClassName: efs-sc
    storageClassNameRWO: ebs-gp3-sc
    deploySettings:
      nonOCP: true
      ensureDb2InstallPlacement: true
  capabilities:
  - name: quantum-safe
    enabled: true
    configurations: {}
  - name: platform
    enabled: true
    configurations:
      ssh-service:
        serviceAnnotations:
          service.beta.kubernetes.io/aws-load-balancer-internal: "false"
      dependency-security:
        networkPolicy:
          egresses:
            enabled: false
            egress-required-allow:
              egress:
                - ports:
                    - protocol: UDP
                      port: 443
                    - protocol: TCP
                      port: 443
                    - protocol: UDP
                      port: 53
                    - protocol: TCP
                      port: 53
                    - port: 5353
                      protocol: UDP
                    - port: 5353
                      protocol: TCP
      dependency-postgres:
        podContainerSecurityContextParams:
          fsGroup: 0
          runAsUser: 1000
          runAsNonRoot: true
      dependency-kafka:
        kafka:
            storage:
              type: persistent-claim
              size: 250Gi
              class: gp2
        zookeeper:
            storage:
              type: persistent-claim
              size: 20Gi
              class: gp2
        podContainerSecurityContextParams:
            fsGroup: 0
            runAsUser: 1000
            runAsNonRoot: true
      dependency-redis:
        podContainerSecurityContextParams:
            fsGroup: 0
            runAsUser: 1000
            runAsNonRoot: true
      guardium-agent-cert-generator:
        podContainerSecurityContextParams:
          fsGroup: 0
          runAsUser: 1000
      mini-snif:
        podContainerSecurityContextParams:
          allowPrivilegeEscalation: false
          capabilities:
            drop:
            - ALL
          privileged: false
          readOnlyRootFilesystem: false
          runAsNonRoot: false
        replicaCount: 1
      dependency-db2:
        db2instance:
          nodes: 2
          storage:
              - name: meta
                spec:
                  accessModes:
                  - ReadWriteMany
                  resources:
                    requests:
                      storage: 1000Gi
                  storageClassName: efs-sc
                type: create
              - name: data
                spec:
                  accessModes:
                  - ReadWriteOnce
                  resources:
                    requests:
                      storage: 100Gi
                  storageClassName: gp2
                type: template
              - name: backup
                spec:
                  accessModes:
                  - ReadWriteMany
                  resources:
                    requests:
                      storage: 2000Gi
                  storageClassName: efs-sc
                type: create
              - name: tempts
                spec:
                  accessModes:
                  - ReadWriteOnce
                  resources:
                    requests:
                      storage: 1000Gi
                  storageClassName: gp2
                type: template
              - name: archivelogs
                spec:
                  accessModes:
                  - ReadWriteMany
                  resources:
                    requests:
                      storage: 500Gi
                  storageClassName: efs-sc
                type: create
EOF
Apply the above CR
kubectl apply -f gdsc-custom-eks.yamlThe deployment may take a little while.
Verifying instance is up
Check to make sure the Guardium Insights custom resource (CR) has been completely reconciled.
kubectl get gdscOutput should look like this:
bash {2} NAME TYPE STATUS REASON MESSAGE DESIRED_VERSION INSTALLED_VERSION gi-eks Ready True Complete Completed Reconciliation 3.6.0 3.6.0
Check that the tenant has been created
kubectl get tenantminisnifOutput should look like this:
bash {2} NAME TYPE STATUS REASON MESSAGE DESIRED_VERSION INSTALLED_VERSION gi-eksctqdrippjy9p2gqvvzwhyc Ready True Complete Completed Reconciliation 3.6.0 3.6.0
Verify all ingress paths have been created
kubectl get ingress -n openshift-marketplaceOutput should look like this:
NAME                                            CLASS    HOSTS                                                          ADDRESS                                                                         PORTS     AGE
cncf-common-web-ui                              nginx    cp-console-openshift-marketplace.apps.gi.thinkforward.work     a904f47d90a8c4961ae389b155359368-aa0f265b8588c710.elb.us-east-1.amazonaws.com   80        5d22h
cncf-id-mgmt                                    nginx    cp-console-openshift-marketplace.apps.gi.thinkforward.work     a904f47d90a8c4961ae389b155359368-aa0f265b8588c710.elb.us-east-1.amazonaws.com   80        5d22h
cncf-platform-auth                              nginx    cp-console-openshift-marketplace.apps.gi.thinkforward.work     a904f47d90a8c4961ae389b155359368-aa0f265b8588c710.elb.us-east-1.amazonaws.com   80        5d22h
cncf-platform-id-auth                           nginx    cp-console-openshift-marketplace.apps.gi.thinkforward.work     a904f47d90a8c4961ae389b155359368-aa0f265b8588c710.elb.us-east-1.amazonaws.com   80        5d22h
cncf-platform-id-provider                       nginx    cp-console-openshift-marketplace.apps.gi.thinkforward.work     a904f47d90a8c4961ae389b155359368-aa0f265b8588c710.elb.us-east-1.amazonaws.com   80        5d22h
cncf-platform-login                             nginx    cp-console-openshift-marketplace.apps.gi.thinkforward.work     a904f47d90a8c4961ae389b155359368-aa0f265b8588c710.elb.us-east-1.amazonaws.com   80        5d22h
cncf-platform-oidc                              nginx    cp-console-openshift-marketplace.apps.gi.thinkforward.work     a904f47d90a8c4961ae389b155359368-aa0f265b8588c710.elb.us-east-1.amazonaws.com   80        5d22h
cncf-saml-ui-callback                           nginx    cp-console-openshift-marketplace.apps.gi.thinkforward.work     a904f47d90a8c4961ae389b155359368-aa0f265b8588c710.elb.us-east-1.amazonaws.com   80        5d22h
cncf-social-login-callback                      nginx    cp-console-openshift-marketplace.apps.gi.thinkforward.work     a904f47d90a8c4961ae389b155359368-aa0f265b8588c710.elb.us-east-1.amazonaws.com   80        5d22h
gi-eks-apigateway-api                           nginx    guardium.apps.gi.thinkforward.work                             a904f47d90a8c4961ae389b155359368-aa0f265b8588c710.elb.us-east-1.amazonaws.com   80, 443   23h
gi-eks-apigateway-docs-dev                      nginx    guardium.apps.gi.thinkforward.work                             a904f47d90a8c4961ae389b155359368-aa0f265b8588c710.elb.us-east-1.amazonaws.com   80, 443   23h
gi-eks-insights                                 nginx    guardium.apps.gi.thinkforward.work                             a904f47d90a8c4961ae389b155359368-aa0f265b8588c710.elb.us-east-1.amazonaws.com   80, 443   23h
gi-eks-s3                                       nginx    s3.guardium.apps.gi.thinkforward.work                          a904f47d90a8c4961ae389b155359368-aa0f265b8588c710.elb.us-east-1.amazonaws.com   80, 443   21h
gi-eks-ssh-service                              <none>   guardium.apps.gi.thinkforward.work                                                                                                             80, 443   23h
gi-eksctqdrippjy9p2gqvvzwhyc-snif-picker-feed   nginx    feed-ctqdrippjy9p2gqvvzwhyc-gi-eks.apps.gi.thinkforward.work   a904f47d90a8c4961ae389b155359368-aa0f265b8588c710.elb.us-east-1.amazonaws.com   80        20h
gi-eksctqdrippjy9p2gqvvzwhyc-snif-picker-unix   nginx    unix-ctqdrippjy9p2gqvvzwhyc-gi-eks.apps.gi.thinkforward.work   a904f47d90a8c4961ae389b155359368-aa0f265b8588c710.elb.us-east-1.amazonaws.com   80        20h
Since we installed everything into the openshift-marketplace namespace, we should see everything there.
Creating the QS tenant
In the current release of GI, in order to create the Quantum Security tenant, you need to scale down all the unnecessary services that are spun up by default in Guardium Insights. Future GI revisions will allow for disabling these services in the CR.
Scale down services
Our example GI instance cluster is called gi-eks. Let’s export that as an env var.
If you’re unsure as to what your instance cluster is called, it can be found with the following command:
kubectl get giOutput should look like this:
NAME     TYPE    STATUS   REASON     MESSAGE                    DESIRED_VERSION   INSTALLED_VERSION
gi-eks   Ready   True     Complete   Completed Reconciliation   3.6.0             3.6.0
export cluster_name="gi-eks"Now scale down the following deployments
kubectl scale deploy \
${cluster_name}-risk-analytics-engine \
${cluster_name}-risk-analytics-ml-classification \
${cluster_name}-rm-risk-engine \
${cluster_name}-outliers-engine \
${cluster_name}-analytics-events \
${cluster_name}-assets \
${cluster_name}-compliance-accelerator \
${cluster_name}-pam-connector-thycotic \
${cluster_name}-policy-builder \
${cluster_name}-postgres-proxy \
${cluster_name}-postgres-sentinel \
${cluster_name}-rm-data-collector \
${cluster_name}-snif-assist \
${cluster_name}-streams \
--replicas=0
Create the tenant
Retrieve the cpadmin password and set it as an env var
export CPPASS=$(kubectl get secret platform-auth-idp-credentials -o jsonpath='{.data.admin_password}' | base64 -d)Create an auth header
export AUTH=$(echo -ne "cpadmin:$CPPASS" | base64)And now let’s submit the request. Our API url is https://guardium.apps.gi.thinkforward.work/api/v3/tenants. This is the URL we set in the CR.
If you are using an insecure hostname, make sure to use that value for the API URL. The local resolution to the external IP of the load balancer should have already been configured in your local hosts file.
For example
https://guardium.apps.gi.guardium-insights.com/api/v3/tenantscurl -k -X 'POST' \
'https://guardium.apps.gi.thinkforward.work/api/v3/tenants' \
-H 'accept: application/json' \
-H 'Content-Type: application/json' \
-H "Authorization: Basic $AUTH" \
-d '{
"async": false,
"external_id": "adv_gi41_qspm_allcom",
"name": "adv_gi41_qspm_allcom",
"part_number": "gi_dedicated_qspm",
"uid": "cpadmin"
}'Sometimes the command runs and nothing happens for awhile. To fix this problem change "async": false to "async": true.
When the tenant is created, the tenant id should be returned
{"tenant_id":"TNT_ACCKEBT4ZIRQW9YRRKCRJH"}Verify the tenant creation
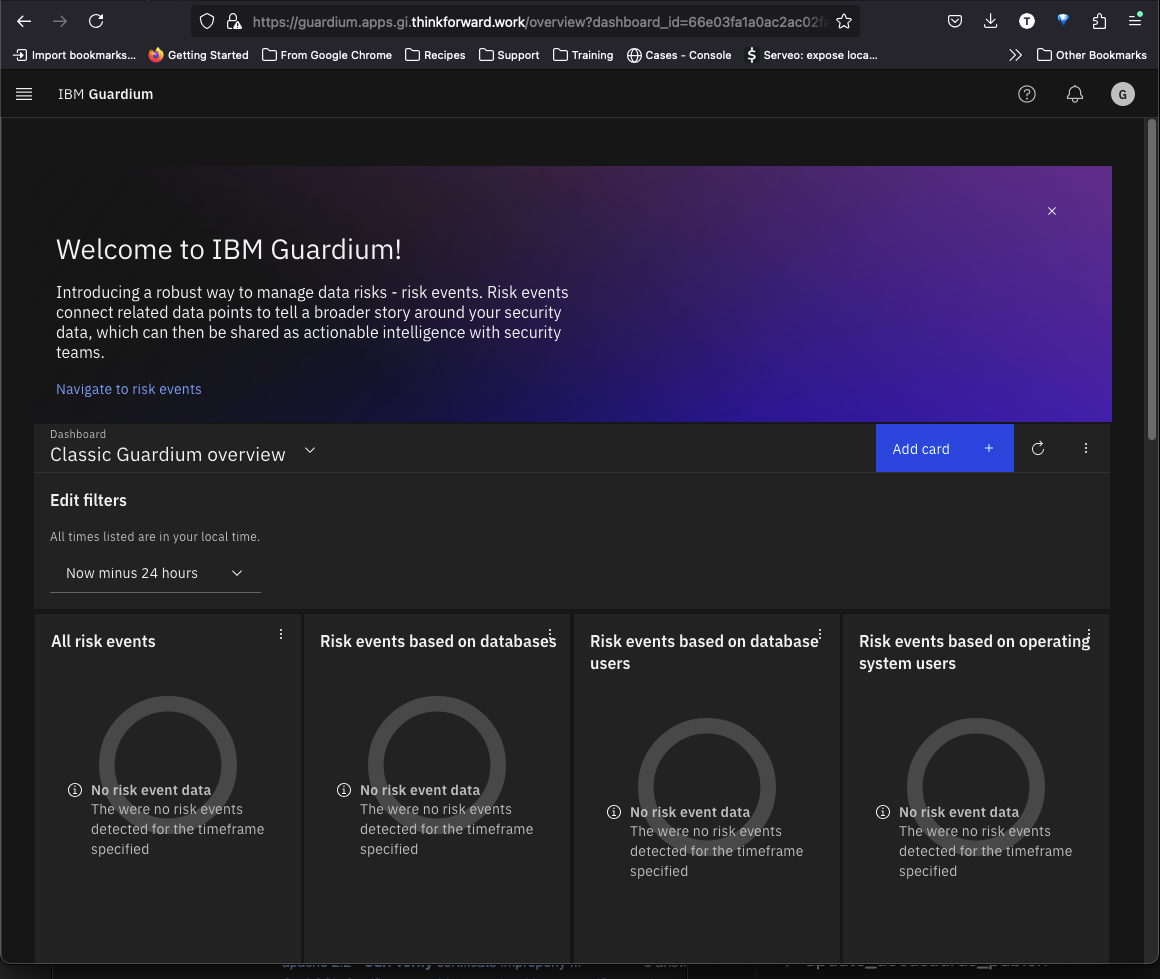
We set the URL for Guardium Insights to guardium.apps.gi.thinkforward.work in our CR. Now open this in a browser.
The console url should open. Login with cpadmin and the password you retrieved and set to $CPPASS

Select the upper rightmost icon and select the QS tenant under Account dropdown. Then click the IBM Guardium logo in the upper left to open the console for the QS tenant.
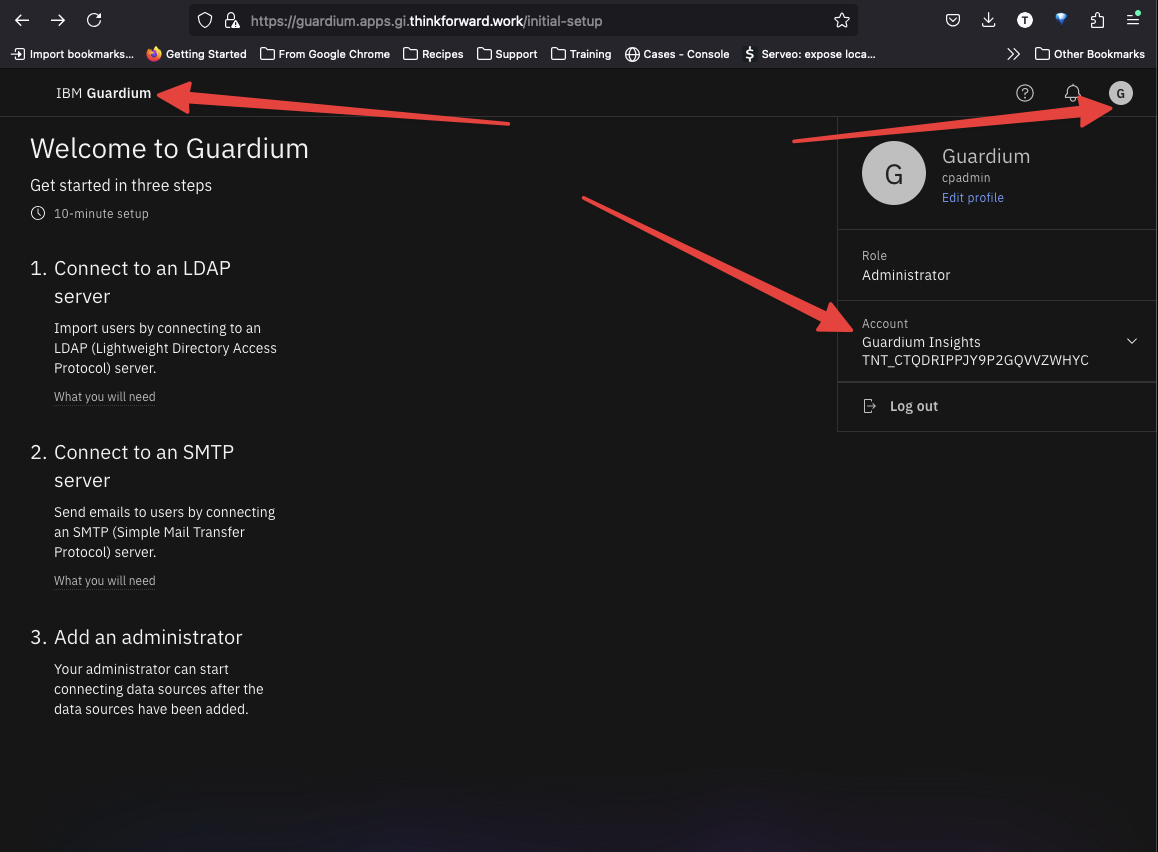
The console should open.