EKS Cluster build
Some of these steps come from this documentation for Guardium Insights on EKS
This assumes you have already configured eksctl and your aws configuration with your account info.
Our documented examples here are creating the cluster in the us-east region. This can be set to whatever region you want.
Run the eksctl command below to create your first cluster and perform the following:
- Create a 5-node Kubernetes cluster named
gi-eastwith node type asm6i.4xlargeand region asus-east-1. - Control plane is managed by AWS EKS, so sizing for control plane nodes doesn’t apply.
- Define a minimum of one node (
--nodes-min 5) and a maximum of three-node (--nodes-max 6) for this node group managed by EKS. - Create a node group with the name
guardium-workersand select a machine type for theguardium-workersnode group.
As of this writing, GI v3.5.0 does not officially support multiple availability zones. This is due to the fact that DB2 will not run across multiple availability zones. The rest of the product will run across zones but because DB2 will not, true availability will not be achieved with multiple availability zones.
Creating the cluster
We’re deploying in us-east-1 and we are naming our cluster gi-east. This name will be exclusive to this cluster, so gi-east is an example here. You aren’t bound to using gi-east as your name.
Let’s set some env vars to make our lives easier.
eksctl create cluster \
--name ${clustername} \
--version 1.31 \
--region ${region} \
--zones ${region}a,${region}b \
--nodegroup-name guardium-workers \
--node-type m6i.4xlarge \
--with-oidc \
--nodes 5 \
--nodes-min 5 \
--nodes-max 6 \
--node-zones ${region}a \
--tags "Product=Guardium" \
--managed
Associate an IAM oidc provider with the cluster if you didn’t include --with-oidc above.
Configure kubectl
Once the cluster is up, add it to your kube config. eksctl will probably do this for you.
If you plan to use the Gatekeeper OPA on your cluster, follow the instructions here
Install the EBS driver to the cluster
We install the EBS CSI driver as this gives us access to GP3 block storage.
Download the example ebs iam policy
Create the policy. You can change AmazonEKS_EBS_CSI_Driver_Policy to a different name, but if you do, make sure to change it in later steps too.
Output should be similar to below
{
    "Policy": {
        "PolicyName": "AmazonEKS_EBS_CSI_Driver_Policy",
        "PolicyId": "ANPA24LVTCGN5YOUAVX2V",
        "Arn": "arn:aws:iam::<ACCOUNT ID>:policy/AmazonEKS_EBS_CSI_Driver_Policy",
        "Path": "/",
        "DefaultVersionId": "v1",
        "AttachmentCount": 0,
        "PermissionsBoundaryUsageCount": 0,
        "IsAttachable": true,
        "CreateDate": "2023-04-19T14:17:03+00:00",
        "UpdateDate": "2023-04-19T14:17:03+00:00",
        "Tags": [
            {
                "Key": "Product",
                "Value": "Guardium"
            }
        ]
    }
}
Let’s export the returned arn as a env VAR for further use
Now let’s export the rolename we are going to create as a env var. We’re going to append the cluster name to the role to differentiate in case we have multiple clusters in this account. You can share policies, but you cannot share roles.
Create the service account
Let’s export the created role arn as another env var
Create the addon for the cluster
Create the following StorageClass yaml to use gp3
Verifying EBS
Run the following command
kubectl apply -f - <<EOF
apiVersion: v1
kind: PersistentVolumeClaim
metadata:
  name: block-pvc
spec:
  storageClassName: ebs-gp3-sc
  accessModes:
    - ReadWriteOnce
  resources:
    requests:
      storage: 1Gi
---
apiVersion: v1
kind: Pod
metadata:
  name: mypod
spec:
  containers:
    - name: myfrontend
      image: nginx
      volumeMounts:
        - mountPath: "/var/www/html"
          name: mypd
  volumes:
    - name: mypd
      persistentVolumeClaim:
        claimName: block-pvc
EOF
Verify the PVC was created
You should see the bound status of the above pvc.
Delete the test pod and pvc
kubectl delete -f - <<EOF
apiVersion: v1
kind: PersistentVolumeClaim
metadata:
  name: block-pvc
spec:
  storageClassName: ebs-gp3-sc
  accessModes:
    - ReadWriteOnce
  resources:
    requests:
      storage: 1Gi
---
apiVersion: v1
kind: Pod
metadata:
  name: mypod
spec:
  containers:
    - name: myfrontend
      image: nginx
      volumeMounts:
        - mountPath: "/var/www/html"
          name: mypd
  volumes:
    - name: mypd
      persistentVolumeClaim:
        claimName: block-pvc
EOF
Enable EFS on the cluster
By default when we create a cluster with eksctl it defines and installs gp2 storage class which is backed by Amazon’s EBS (elastic block storage). After that we installed the EBS CSI driver to support gp3. However, both gp2 and gp3 are both block storage. They will not support RWX in our cluster. We need to install an EFS storage class.
Create IAM policy
Download the IAM policy document from GitHub. You can also view the policy document
Create the policy. You can change AmazonEKS_EFS_CSI_Driver_Policy to a different name, but if you do, make sure to change it in later steps too.
Output should be similar to below
{
    "Policy": {
        "PolicyName": "AmazonEKS_EFS_CSI_Driver_Policy",
        "PolicyId": "ANPA3WENOYSA6LSFRSZ6U",
        "Arn": "arn:aws:iam::803455550593:policy/AmazonEKS_EFS_CSI_Driver_Policy",
        "Path": "/",
        "DefaultVersionId": "v1",
        "AttachmentCount": 0,
        "PermissionsBoundaryUsageCount": 0,
        "IsAttachable": true,
        "CreateDate": "2024-08-23T19:57:13+00:00",
        "UpdateDate": "2024-08-23T19:57:13+00:00",
        "Tags": [
            {
                "Key": "Product",
                "Value": "Guardium"
            }
        ]
    }
}
Let’s export that policy arn as another env var
Create IAM role
Now let’s export the rolename we are going to create as a env var. We’re going to append the cluster name to the role to differentiate in case we have multiple clusters in this account. You can share policies, but you cannot share roles.
Create an IAM role and attach the IAM policy to it. Annotate the Kubernetes service account with the IAM role ARN and the IAM role with the Kubernetes service account name.
Once created, check the iam service account is created running the following command.
Should return
Install EFS CSI driver
Now we just need our add-on registry address. This can be found here: https://docs.aws.amazon.com/eks/latest/userguide/add-ons-images.html
The add-on registry address is per region. So based on the URL above, since our region is us-east-1, then our registry address would be 602401143452.dkr.ecr.us-east-1.amazonaws.com/eks/aws-efs-csi-driver
Let’s install the driver add-on to our clusters. We’re going to use helm for this.
Install a release of the driver using the Helm chart. Replace the repository address with the cluster’s container image address.
Verify that it installed correctly with this command
Should return something like
Create the EFS Filesystem
Now we need to create the filesystem in EFS so we can use it
Export the following variables.
Get our VPC ID
Retrieve the CIDR range for your cluster’s VPC and store it in a variable for use in a later step.
Create a security group with an inbound rule that allows inbound NFS traffic for your Amazon EFS mount points.
Create an inbound rule that allows inbound NFS traffic from the CIDR for your cluster’s VPC.
Create a file system.
Create mount targets.
Determine the IDs of the subnets in your VPC and which Availability Zone the subnet is in.
Should output something like the following
----------------------------------------------------------------------
|                           DescribeSubnets                          |
+------------------+--------------------+----------------------------+
| AvailabilityZone |     CidrBlock      |         SubnetId           |
+------------------+--------------------+----------------------------+
|  us-east-1c      |  192.168.64.0/19   |  subnet-08c33dce5e63c82dc  |
|  us-east-1b      |  192.168.32.0/19   |  subnet-0f7a2b449320cc1e6  |
|  us-east-1a      |  192.168.0.0/19    |  subnet-0ec499ae3eae19eb0  |
|  us-east-1b      |  192.168.128.0/19  |  subnet-04f3d465138687333  |
|  us-east-1a      |  192.168.96.0/19   |  subnet-0bc4d31344c60c113  |
|  us-east-1c      |  192.168.160.0/19  |  subnet-0bee6fc06187cafd1  |
+------------------+--------------------+----------------------------+
Add mount targets for the subnets that your nodes are in.
Run the following command:
for subnet in $(aws ec2 describe-subnets --filters "Name=vpc-id,Values=$vpc_id" --query 'Subnets[*].{SubnetId: SubnetId,AvailabilityZone: AvailabilityZone,CidrBlock: CidrBlock}' --region $region --output text | awk '{print $3}') ; do aws efs create-mount-target --file-system-id $file_system_id --region $region --subnet-id $subnet --security-groups $security_group_id ; doneThis wraps the below command in a for loop that will iterate through your subnet ids.
Create EFS Storage Class
Create a storage class for dynamic provisioning
Let’s get our filesystem ID if we don’t already have it above. However if you ran the above steps, $file_system_id should already be defined.
If you did not export the $file_system_id variable, make sure the filesystem id you use in the below command is the filesystem id that was returned to you above!
Create the storage class
cat <<EOF | envsubst | kubectl apply -f -
apiVersion: storage.k8s.io/v1
kind: StorageClass
metadata:
  name: efs-sc
parameters:
  uid: "0"
  gid: "0"
  directoryPerms: "777"
  fileSystemId: ${file_system_id}
  provisioningMode: efs-ap
provisioner: efs.csi.aws.com
reclaimPolicy: Delete
volumeBindingMode: Immediate
EOFSet one of the EFS storage classes as the default storage class only if you intend on primarily using EFS. Otherwise set block storage as default.
If using EFS as primary storage
If using EBS(block) as primary storage
Finally, verify they are both there
Verify EFS
Run the following command to create a pod and a PVC using the default EFS storage class
kubectl apply -f - <<EOF
apiVersion: v1
kind: PersistentVolumeClaim
metadata:
  name: block-pvc
spec:
  storageClassName: efs-sc
  accessModes:
    - ReadWriteOnce
  resources:
    requests:
      storage: 1Gi
---
apiVersion: v1
kind: Pod
metadata:
  name: mypod
spec:
  containers:
    - name: myfrontend
      image: nginx
      volumeMounts:
        - mountPath: "/var/www/html"
          name: mypd
  volumes:
    - name: mypd
      persistentVolumeClaim:
        claimName: block-pvc
EOF
Running the following command should verify the PVC was successfully created and bound
Now we can delete our test pod and pvc
kubectl delete -f - <<EOF
apiVersion: v1
kind: PersistentVolumeClaim
metadata:
  name: block-pvc
spec:
  storageClassName: efs-sc
  accessModes:
    - ReadWriteOnce
  resources:
    requests:
      storage: 1Gi
---
apiVersion: v1
kind: Pod
metadata:
  name: mypod
spec:
  containers:
    - name: myfrontend
      image: nginx
      volumeMounts:
        - mountPath: "/var/www/html"
          name: mypd
  volumes:
    - name: mypd
      persistentVolumeClaim:
        claimName: block-pvc
EOF
Install NGINX Controller
If you plan on using AWS ALB for ingress, follow the directions here
Let’s install the NGINX helm chart
Create the namespace for NGINX
Below is for a public facing ingress. Yours might need to be internal only so you would set the aws-load-balancer-scheme to internal if it needs to be internal.
helm install ingress-nginx ingress-nginx/ingress-nginx \
--set-string controller.service.annotations.'service\.beta\.kubernetes\.io/aws-load-balancer-backend-protocol'=tcp \
--set-string controller.service.annotations.'service\.beta\.kubernetes\.io/aws-load-balancer-cross-zone-load-balancing-enabled'="true" \
--set-string controller.service.annotations.'service\.beta\.kubernetes\.io/aws-load-balancer-scheme'=internet-facing \
--set-string controller.service.annotations."service\.beta\.kubernetes\.io/aws-load-balancer-nlb-target-type"=ip \
--set-string controller.service.annotations.'service\.beta\.kubernetes\.io/aws-load-balancer-type'=nlb \
--namespace=ingress-nginx
Run the following command to verify that a load balancer was assigned
Verify the NGINX deployment
Verify the deployment
Command:
Example output:
Install the Operator Lifecycle Manager
The default method of installing OLM is to use the operator-sdk command line tool. This method creates ClusterRole and ClusterRoleBinding resources that require wildcard permissions at the cluster level.
If the security on your cluster is configured to not allow wildcard permissions at the cluster level, proceed with the “Custom OLM” section below to install OLM without wildcard permissions.
Verify the installation
kubectl get csv -n olm | grep packageserverSet the OLM global namespade to use openshift-marketplace
We further require to change the global namespace for the packageserver as well. To do so, run the following command:
Verify the global-namespace has been set
Should return
      - command:
        - /bin/package-server
        - -v=4
        - --secure-port
        - "5443"
        - --global-namespace
1 - openshift-marketplace- 1
- This is the value we care about
Create the required Namespace
Set our context to that namespace and export it as an env var
Install the IBM Cert Manager
If you cannot use the IBM Cert Manager, follow the directions here
If you followed the directions here you should have the ibm-guardium-insights case file downloaded and extracted.
Change to the following directory
Create the namespace and then run the installation script
Give it a few minutes and then verify the cert manager is up
NAME                                                              READY   STATUS      RESTARTS   AGE
cd6e1c2b84458a4f431f49f499a919d28af0b23693e36f2fc53bc1f2c3hw5pw   0/1     Completed   0          2m1s
cert-manager-cainjector-85777f77cc-hbzg7                          1/1     Running     0          102s
cert-manager-controller-957bc947-kg5wx                            1/1     Running     0          102s
cert-manager-webhook-5586d798f-lcsln                              1/1     Running     0          102s
ibm-cert-manager-catalog-rcbvc                                    1/1     Running     0          2m12s
ibm-cert-manager-operator-64fc5b4644-rnpqg 1/1 Running 0 108sNAME DISPLAY VERSION REPLACES PHASE
ibm-cert-manager-operator.v4.2.7 IBM Cert Manager 4.2.7 SucceededConfigure DNS resolution (Optional)
If you are following the instrutions in this guide using the “insecure” hostname sections to avoid registering domains, it’s possible to use Route 53 in AWS set up explicit DNS resolution for the specific host routes needed.
Go to AWS Route 53 and click Hosted zones heading. Then click the Create hosted zone button. This will open the hosted zone form.
For the domain use
apps.gi.guardium-insights.comFor type, select Private hosted zone
For the VPCs to associate with the hosted zone, select the proper region, then select the VPC that was created for your cluster.
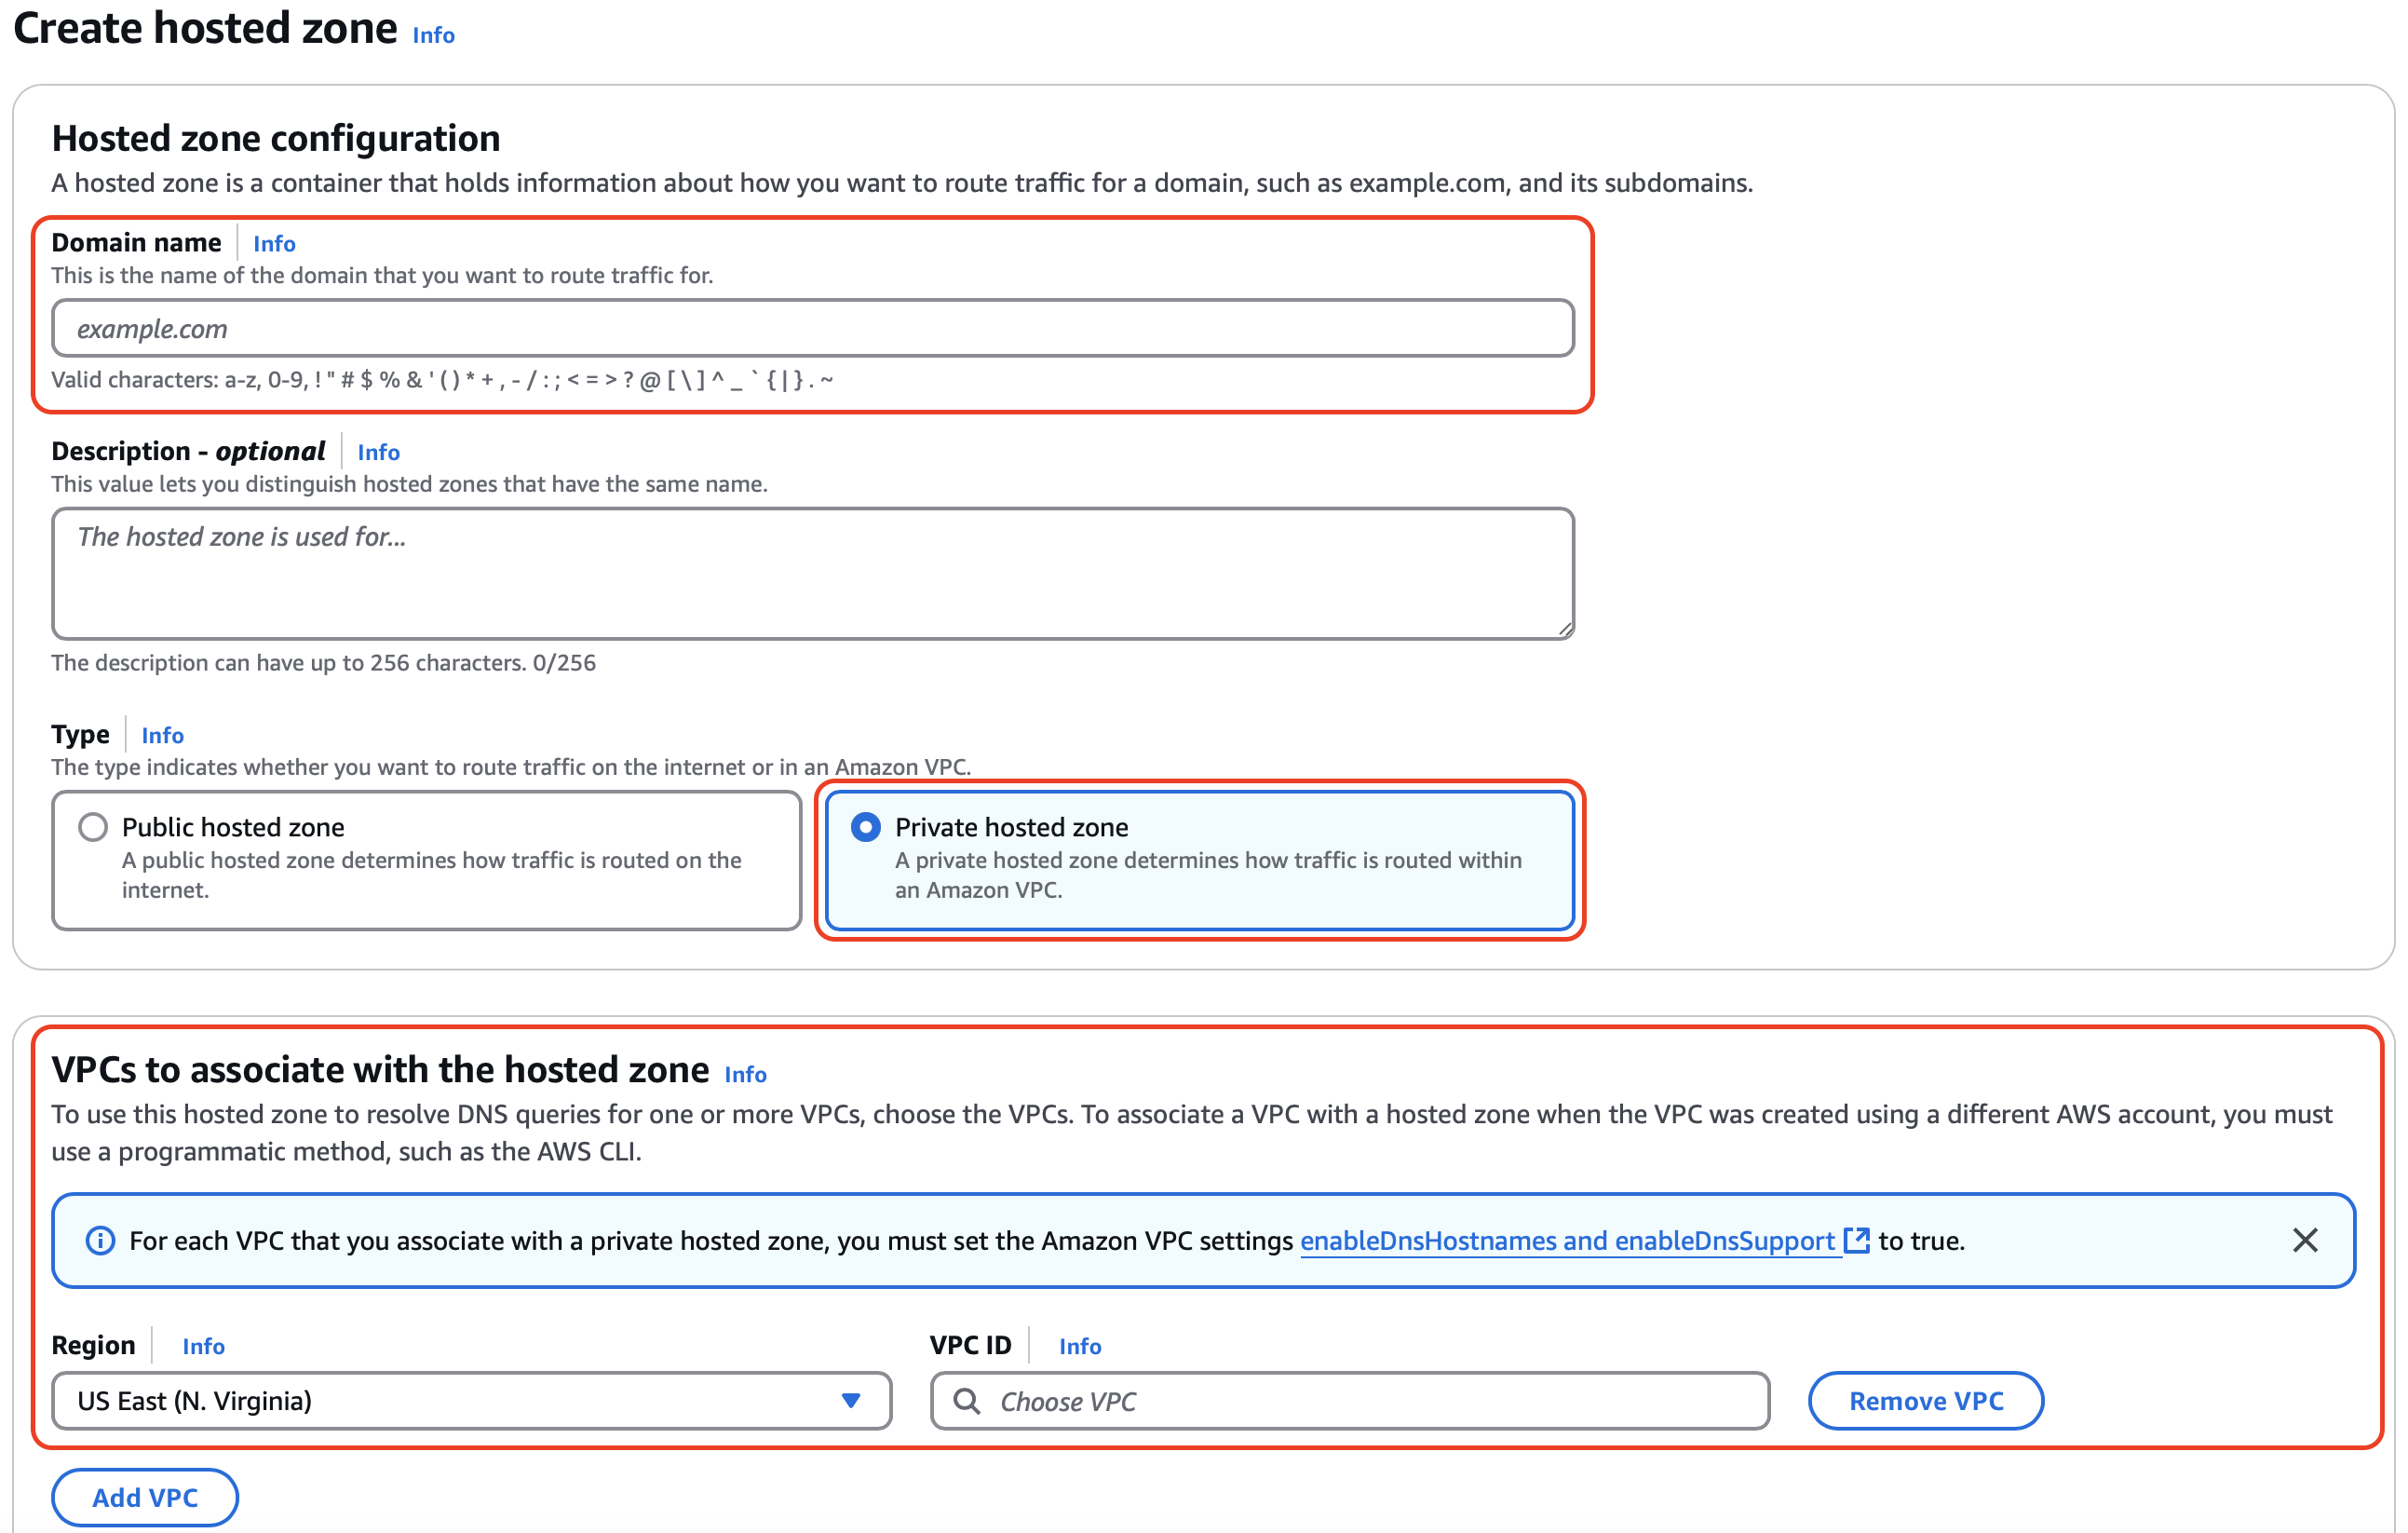
Then click Create Hosted zone button to create the hosted zone.
This will take you to the hosted zone details page. Now it’s time to create some records for DNS resolution. But first we need the values to use for the internal routing.
Find the external cluster IP address of the load balancer under EXTERNAL-IP.
Capture that EXTERNAL-IP value for the next steps.
Back on the hosted zone details page, click the Create record button.
We want to create a CNAME record that routes *.apps.gi.guardium-insights.com to the external cluster IP address captured above.

Click Create Records.
Install Foundational Services
As noted here make sure you have retrieved your entitlement key for the next step
Export your entitlement key as an env var
Change to the following directory
As of this writing, we are using Guardium Data Security center v3.6.0 which uses bundle version 2.6.0.
Export the following vars
export REPLACE_NAMESPACE=openshift-marketplace
export NAMESPACE=openshift-marketplace
export ICS_INVENTORY_SETUP=ibmCommonServiceOperatorSetup
export ICS_SIZE=starterset
export IBMPAK_LAUNCH_SKIP_PREREQ_CHECK=true
export CP_REPO_USER="cp"
export CP_REPO_PASS=${IBMKEY}
export NAMESPACE="openshift-marketplace"
export CASE_NAME=ibm-guardium-data-security-center
export CASE_VERSION=2.6.0
export LOCAL_CASE_DIR=$HOME/.ibm-pak/data/cases/$CASE_NAME/$CASE_VERSIONSave the CASE bundle locally
This will download the CASE bundle to $HOME/.ibm-pak/data/cases/ibm-guardium-data-security-center/2.6.0
Whether you’re using Route 53 or external DNS, a CNAME must be created if you’re using NGINX as your Ingress Controller.
For our example setup, we are working with the thinkforward.work domain. So we set the domain in our remote dns to apps.gi.thinkforward.work. Other users may need to configure their FQDN in AWS Route 53.
The important part is there must be a wildcard subdomain. It should point to our loadbalancer.
Retrieve the loadbalancer ip with this command:
Should return bash {2} NAME TYPE CLUSTER-IP EXTERNAL-IP PORT(S) AGE ingress-nginx-controller LoadBalancer 10.100.129.192 k8s-ingressn-ingressn-7e06ec0c6b-01363c775f8b7ff9.elb.us-east-1.amazonaws.com 80:32113/TCP,443:31457/TCP 24h
Our external IP above is k8s-ingressn-ingressn-7e06ec0c6b-01363c775f8b7ff9.elb.us-east-1.amazonaws.com
So for us, our actual DNS record should be like this:
The * wildcard ensures that any subdomain generated by GI will map back to that loadbalancer.
Export the hostname as an env var. It’s important to note that your domain must begin with apps. If you have multiple clusters, a good practices would be apps.<CLUSTERNAME>.<DOMAIN>.
Run the following ibm-pak command to install the Foundational Services catalogs
This assumes you’ve mirrored all required GI and CPFS images to your private registry. Export your private registry as an env var (my.registry.io is an example.)
Set the following vars:
Else set it to
:::cautionRequired for Air Gapped installations You will need to install the Gatekeeper OPA AND configure mutations if using a private registry! :::
Now run the following ibm-pak command to install the Foundational Services operators
This assumes you’ve mirrored all required GI and CPFS images to your private registry and exported the $myprivatereg as an env var.
Set the following vars:
omit --user, --pass, --secret if you did not set these on your private repo.
Else set it this to use the public and entitled registries:
You will need to install the Gatekeeper OPA AND configure mutations if using a private registry!
If you are performing an airgapped install, you must perform the following steps:
After kicking off the install-operator above, open another terminal and export your private registry as an env var (my.registry.io is an example).
Now wait for the cloud-native-postgreql-image-list config map to be created.
When it appears, run the following
Then patch the config map.
Now wait for the cloud-native-postgresql.v1.18.12 ClusterServiceVersion to be created
When it appears, run the following:
Patch the CSV
Now you can return to your previous terminal to wait for the installation to complete.
This may take a little while to run.
Verify Foundational Services are properly installed
Output should look like this:
ibm-cert-manager-operator.v4.2.11 IBM Cert Manager 4.2.11 Succeeded
ibm-common-service-operator.v4.6.6 IBM Cloud Pak foundational services 4.6.6 Succeeded
ibm-commonui-operator.v4.4.5 Ibm Common UI 4.4.5 Succeeded
ibm-events-operator.v5.0.1 IBM Events Operator 5.0.1 Succeeded
ibm-iam-operator.v4.5.5 IBM IM Operator 4.5.5 Succeeded
ibm-zen-operator.v5.1.8 IBM Zen Service 5.1.8 SucceededVerify that the operand requests have completed and installed
Output should look like this:
Verify the policies have all been created
Output should look like this:
NAME POD-SELECTOR AGE
access-to-audit-svc component=zen-audit 4m1s
access-to-common-web-ui k8s-app=common-web-ui 4m19s
access-to-edb-postgres k8s.enterprisedb.io/cluster 4m16s
access-to-edb-postgres-webhooks app.kubernetes.io/name=cloud-native-postgresql 3m30s
access-to-ibm-common-service-operator name=ibm-common-service-operator 3m27s
access-to-ibm-nginx component=ibm-nginx 3m58s
access-to-icp-mongodb app=icp-mongodb 4m13s
access-to-platform-auth-service k8s-app=platform-auth-service 4m10s
access-to-platform-identity-management k8s-app=platform-identity-management 4m5s
access-to-platform-identity-provider k8s-app=platform-identity-provider 4m3s
access-to-usermgmt component=usermgmt 3m55s
access-to-volumes icpdsupport/app=volumes 3m42s
access-to-zen-core component=zen-core 3m50s
access-to-zen-core-api component=zen-core-api 3m52s
access-to-zen-meta-api app.kubernetes.io/instance=ibm-zen-meta-api 3m24s
access-to-zen-minio component=zen-minio 3m46s
access-to-zen-watchdog component=zen-watchdog 3m39s
allow-iam-config-job component=iam-config-job 3m34s
allow-webhook-access-from-apiserver <none> 3m21sVerify NGINX ingresses have been created
{/*
Install Kubernetes Ingresses
Export the following values. As above, the example FQDN we are using is apps.gi.thinkforward.work. Yours may be different depending on what you’ve set in your DNS or Route 53.
For development purposes only, you can avoid registering a domain name and setting up certificates by using your local hosts file to redirect traffic later in this guide. If taking this route, you can use the following:
Run the Configmap creation with the following commands
while [[ $(kubectl get secret platform-oidc-credentials -ojsonpath='{.data.WLP_CLIENT_SECRET}' | base64 -d | wc -c) -eq 0 ]] ; do echo Waiting 30 seconds for platform-oidc-credentials to be created with the correct content; sleep 30; done
client_id="$(kubectl get secret platform-oidc-credentials -o yaml |grep 'WLP_CLIENT_ID:' | sed 's/WLP_CLIENT_ID: * //' | awk '{print $1}')"
client_id=`echo $client_id|base64 --decode`
echo $client_id
cat cpfs-ingress-template.yaml | sed 's#REPLACE_CLIENT_ID#'$client_id'#g' | sed 's#REPLACE_NAMESPACE#'$NAMESPACE'#g' | sed 's#REPLACE_HOSTNAME#'$HOSTNAME'#g' | kubectl apply -f -*/}
Verify the ingress creation
Output should look like this:
NAME CLASS HOSTS ADDRESS PORTS AGE
cncf-common-web-ui nginx cp-console-openshift-marketplace.apps.gi.thinkforward.work k8s-ingressn-ingressn-7e06ec0c6b-01363c775f8b7ff9.elb.us-east-1.amazonaws.com 80 13s
cncf-id-mgmt nginx cp-console-openshift-marketplace.apps.gi.thinkforward.work k8s-ingressn-ingressn-7e06ec0c6b-01363c775f8b7ff9.elb.us-east-1.amazonaws.com 80 13s
cncf-platform-auth nginx cp-console-openshift-marketplace.apps.gi.thinkforward.work k8s-ingressn-ingressn-7e06ec0c6b-01363c775f8b7ff9.elb.us-east-1.amazonaws.com 80 13s
cncf-platform-id-auth nginx cp-console-openshift-marketplace.apps.gi.thinkforward.work k8s-ingressn-ingressn-7e06ec0c6b-01363c775f8b7ff9.elb.us-east-1.amazonaws.com 80 13s
cncf-platform-id-provider nginx cp-console-openshift-marketplace.apps.gi.thinkforward.work k8s-ingressn-ingressn-7e06ec0c6b-01363c775f8b7ff9.elb.us-east-1.amazonaws.com 80 13s
cncf-platform-login nginx cp-console-openshift-marketplace.apps.gi.thinkforward.work k8s-ingressn-ingressn-7e06ec0c6b-01363c775f8b7ff9.elb.us-east-1.amazonaws.com 80 13s
cncf-platform-oidc nginx cp-console-openshift-marketplace.apps.gi.thinkforward.work k8s-ingressn-ingressn-7e06ec0c6b-01363c775f8b7ff9.elb.us-east-1.amazonaws.com 80 13s
cncf-saml-ui-callback nginx cp-console-openshift-marketplace.apps.gi.thinkforward.work k8s-ingressn-ingressn-7e06ec0c6b-01363c775f8b7ff9.elb.us-east-1.amazonaws.com 80 13s
cncf-social-login-callback nginx cp-console-openshift-marketplace.apps.gi.thinkforward.work k8s-ingressn-ingressn-7e06ec0c6b-01363c775f8b7ff9.elb.us-east-1.amazonaws.com 80 13sIf you used an insecure hostname above, configure your local workstation to redirect traffic to the external IP of the ingress.
Find the public hostname address of the ingress under EXTERNAL-IP.
NAME                       TYPE           CLUSTER-IP      EXTERNAL-IP                                                                     PORT(S)                      AGE
ingress-nginx-controller LoadBalancer 10.100.24.243 a091398910dbf4ad8aeb2f3f0e864311-916cbf853e32c1d5.elb.us-east-2.amazonaws.com 80:31369/TCP,443:30370/TCP 20hFind the public IP address of the of the public hostname.
nslookup a091398910dbf4ad8aeb2f3f0e864311-916cbf853e32c1d5.elb.us-east-2.amazonaws.com
Server:         10.255.255.254
Address:        10.255.255.254#53

Non-authoritative answer:
Name:   a091398910dbf4ad8aeb2f3f0e864311-916cbf853e32c1d5.elb.us-east-2.amazonaws.com
Address: 13.58.11.46
Name:   a091398910dbf4ad8aeb2f3f0e864311-916cbf853e32c1d5.elb.us-east-2.amazonaws.com
Address: 3.19.41.78
Notice that there are 2 public IP addresses associated with the hostname. This is because that hostname is on a load balancer. For our purposes, you only need one of those IP addresses. We will use 13.58.11.46 here.
Open your hosts file on your workstation where you will be using the browser to connect. For Windows that is under C:\Windows\System32\drivers\etc\hosts. For Linux that is under /etc/hosts.
Add a line that redirects network traffic from the insecure hostname to the public IP address and save the file.
After installing Guardium Insights (next step), another ingress will be created that will need to be added to the local hosts file. Add that additional line now, even though that hostname will not redirect properly until after Guardium Insights is installed.
Verify Ingress
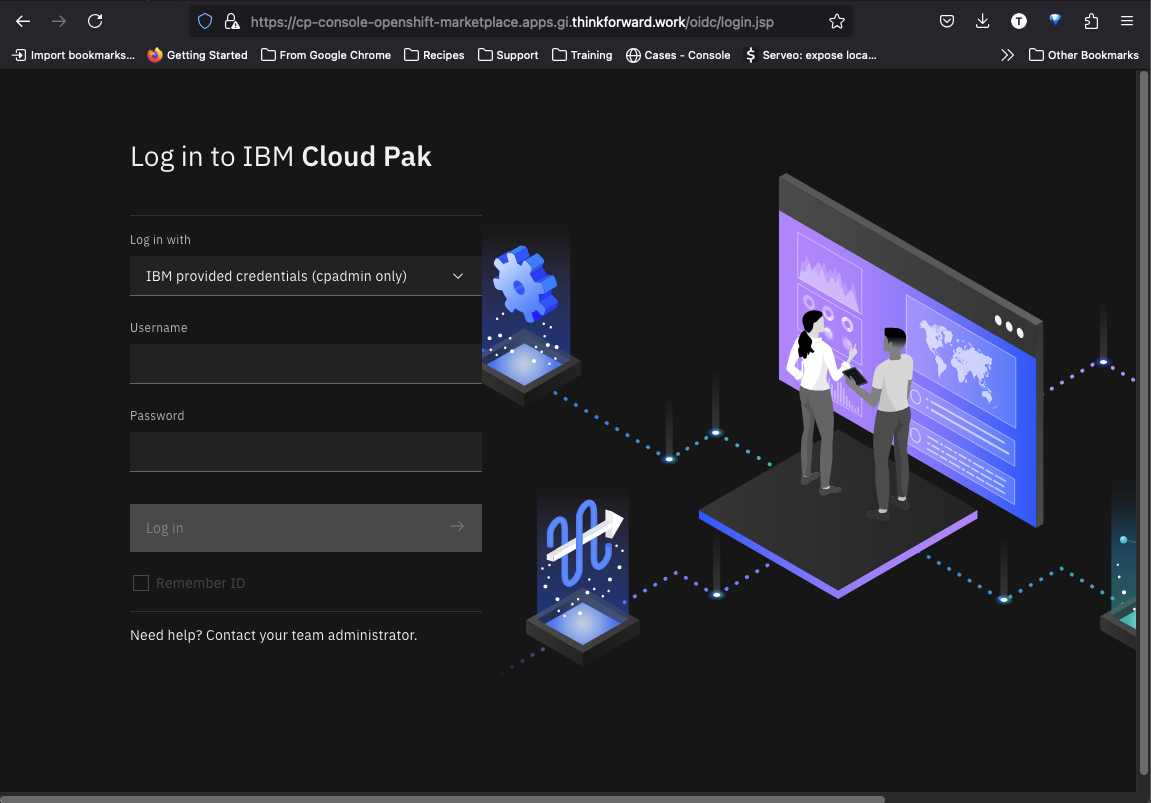
Verify that the common webui is now up and available by going to the link above (this will reflect whatever you set for your domain). In our case it is cp-console-openshift-marketplace.apps.gi.thinkforward.work
If you used an insecure hostname above, use cp-console-openshift-marketplace.apps.gi.guardium-insights.com to verify.
You can retrieve the cpadmin password with the following
This will return the password for the cpadmin user. You can then use cpadmin to login.